The Best Fluffy Pancakes recipe you will fall in love with. Full of tips and tricks to help you make the best pancakes.
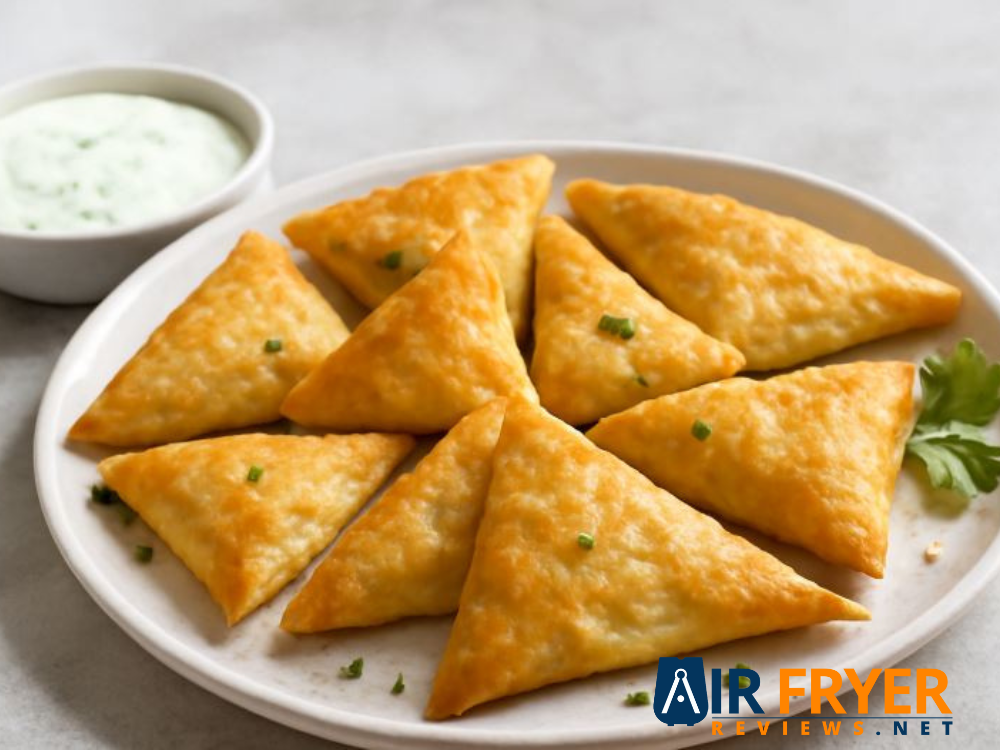
Craving that crispy feta triangle with its golden flaky phyllo pastry and irresistible savory filling? You’re not alone. Many home cooks long to recreate this beloved Greek appetizer known traditionally as tiropitakia but often run into common issues like soggy layers cracked pastry or a filling that tastes more flat than flavorful.
This guide is here to change that. We’ll walk you through every detail of making the best feta triangles at home from choosing high quality feta cheese and handling phyllo dough with confidence to mastering the folds that lock in flavor while keeping each bite crisp. Whether you’re preparing them for a dinner party a holiday spread or just a cozy evening snack these homemade feta triangles will rival those from your favorite taverna.
What makes this recipe stand out is its balance of tradition and simplicity. It’s inspired by authentic Greek kitchens yet streamlined for today’s home cooks. We’ve also built in practical tips for make ahead feta triangles so you can prep in advance and still enjoy that perfect crunch when serving.
This recipe has been tested repeatedly by home cooks at different skill levels. Every step has been refined to address common pitfalls like tearing phyllo sheets or uneven browning so even first time bakers can achieve crispy flavorful results. Consider this your go-to playbook for mastering Greek feta triangles with confidence.
Why You’ll Love This Recipe
✓ Effortlessly impressive. These crispy feta triangles instantly elevate any gathering. Despite their elegant look they’re surprisingly easy to prepare making them ideal for both weeknight treats and special occasions.
✓ Authentic Greek flavors. Enjoy the savory filling made with tangy feta cheese wrapped in delicate phyllo pastry giving you a true taste of Greece in every bite.
✓ Crispy perfection guaranteed. With our step-by-step instructions and tips for handling phyllo dough you’ll achieve beautifully golden flaky layers that stay crisp never soggy.
✓ Time-saving & freezer-friendly. Learn how to make make ahead feta triangles that store well in the freezer so you can bake them fresh whenever guests arrive.
✓ Versatile & customizable. Experiment with variations by adding spinach herbs or even a touch of spice to create your own version of this classic Greek appetizer
✓ Crowd & pleaser. These homemade feta triangles are universally loved and tend to vanish quickly from any platter whether served as party snacks, appetizers or part of a mezze spread.
Gather Your Tools & Ingredients
Essential Kitchen Tools
To make your crispy feta triangles with ease have these tools ready before you begin:
✓ Large mixing bowl
✓ Small saucepan (for melting butter or olive oil)
✓ Pastry brush (for coating phyllo sheets)
✓ Sharp knife or pizza cutter
✓ Baking sheets
✓ Parchment paper
✓ Measuring cups and spoons
Ingredients List
| Ingredient | Quantity | Notes / Substitutions (Optional) |
| Phyllo dough, frozen | 1 lb (1 pack) | Use high quality brands like Athens Foods or The Fillo Factory. Thaw overnight in the fridge then keep covered with a damp towel while working to prevent drying. |
| Feta cheese, crumbled | 12 oz | Authentic Greek feta (sheep’s milk preferred). Avoid pre crumbled as it’s drier and less flavorful. |
| Fresh spinach, chopped | 10 oz | Or use 10 oz frozen spinach, thawed and squeezed very dry to avoid sogginess. |
| Large egg | 1 | Lightly beaten helps bind the filling. |
| Extra virgin olive oil | 1/2 cup | Choose a high quality oil for brushing phyllo layers; adds depth of flavor. |
| Unsalted butter, melted | 1/4 cup | For brushing phyllo. Can replace with all olive oil for a dairy free option. |
| Fresh dill, chopped | 2 tbsp | Optional but adds authentic Greek flavor. |
| Fresh mint, chopped | 1 tbsp | Optional brightens the filling. |
| Black pepper, freshly ground | 1/2 tsp | Adjust to taste. |
| Nutmeg, grated | Pinch | Optional enhances spinach and cheese flavors. |
🔑 Pro Tip: Always keep your phyllo dough covered with a damp kitchen towel while assembling. Even a minute of exposure can make sheets brittle and hard to fold.
Key Ingredients for Authentic Flavor
✓ Good quality phyllo dough. Consistency is everything when working with phyllo pastry. Choose trusted brands like Athens Foods or The Fillo Factory for sheets that are thin, pliable and less prone to tearing.
✓ Authentic Greek feta cheese. For that true tangy bite go for sheep’s milk feta ideally brine packed. It delivers a creamier texture and more pronounced flavor compared to cow’s milk versions. Steer clear of pre crumbled feta as it tends to be dry and lacking in depth.
✓ High-quality extra virgin olive oil. Since you’ll be brushing multiple layers of phyllo dough a robust extra virgin olive oil is key. It enhances flavor while ensuring the pastry bakes to crisp, golden perfection.
✨ Tip for Readers: Investing in these three ingredients makes the difference between decent and unforgettable crispy feta triangles.
Mastering the Crispy Feta Triangle Step by Step Guide
1. Preparing the Flavorful Feta & Spinach Filling
✓ Spinach prep. If using fresh spinach saute until just wilted then cool and squeeze very dry. For frozen spinach thaw completely and press out as much liquid as possible. Removing excess moisture is crucial to prevent soggy feta triangles.
✓ Combine ingredients. In a large mixing bowl add crumbled feta cheese thoroughly dried spinach a lightly beaten egg, fresh dill, mint, black pepper and a pinch of nutmeg.
✓ Taste & adjust Expert tip: Always taste the filling before adding too much extra seasoning. Feta cheese is naturally salty so adjust with pepper or herbs rather than more salt. Mix gently until combined avoid overmixing to keep the filling light.
2. Expert Phyllo Handling Techniques
✓ Proper thawing Phyllo dough. Should be thawed in the refrigerator overnight while still in its packaging. Bring to room temperature for 1-2 hours before use to prevent cracking.
✓ Keep covered. Work quickly and always cover unused phyllo sheets with a slightly damp (not wet) towel. This prevents drying and keeps the sheets pliable.
✓ Melt butter & oil. In a small bowl melt unsalted butter and mix with extra virgin olive oil. This blend provides the perfect balance of flavor and helps the phyllo pastry bake to golden crispness.
✓ Layer, don’t soak Expert tip: Brush each sheet lightly with the butter oil mixture just enough to coat. Over brushing or soaking makes the layers heavy and prevents them from crisping properly.
✨ With the filling ready and your phyllo dough prepped you’re now set for the fun part folding and shaping the triangles.
Visual Guide: How to Fold Feta Triangles
Folding phyllo dough into neat sealed triangles may seem intimidating at first but with a simple method you’ll master it quickly. Here’s a step by step guide with suggested visuals or GIFs to make the process even clearer:
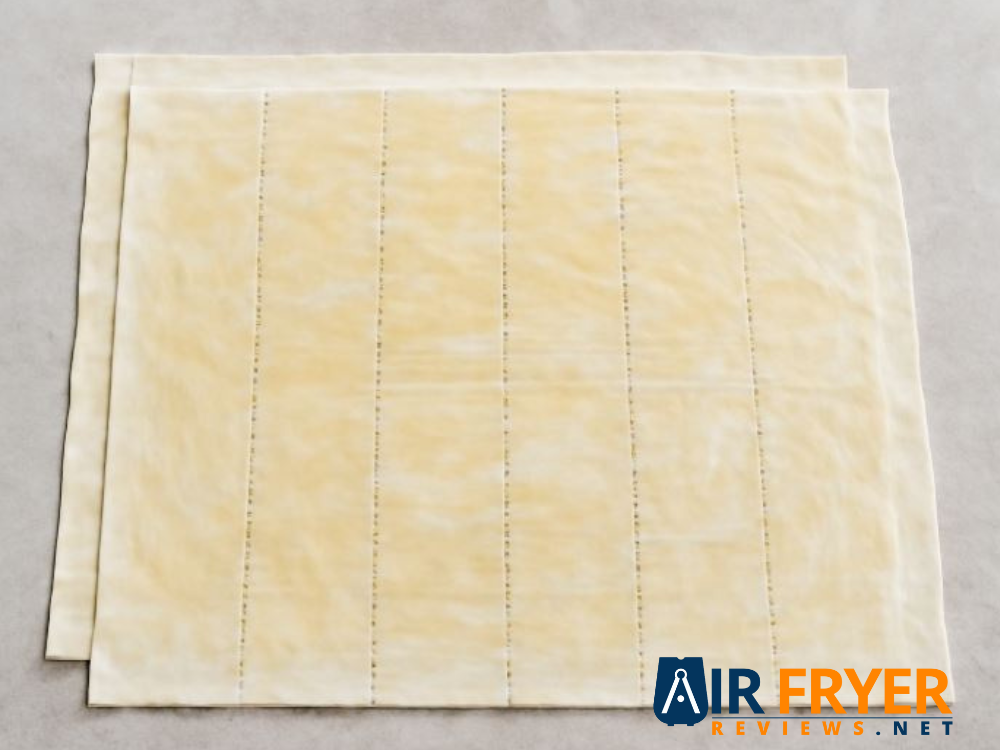
Step 1: Prepare Your Strip
Lay one sheet of phyllo dough on a clean dry surface. Lightly brush the entire surface with the butter/oil mixture. Place another sheet directly on top and brush again. Using a sharp knife or pizza cutter slice the stacked sheets lengthwise into 3-4 strips each about 2 inches wide.
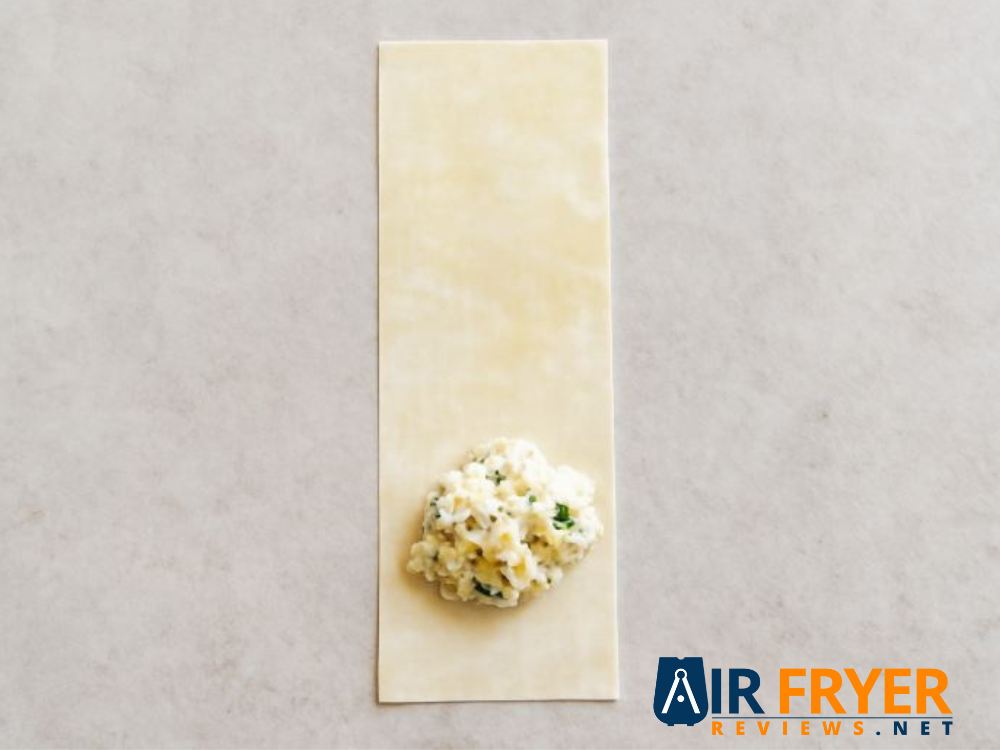
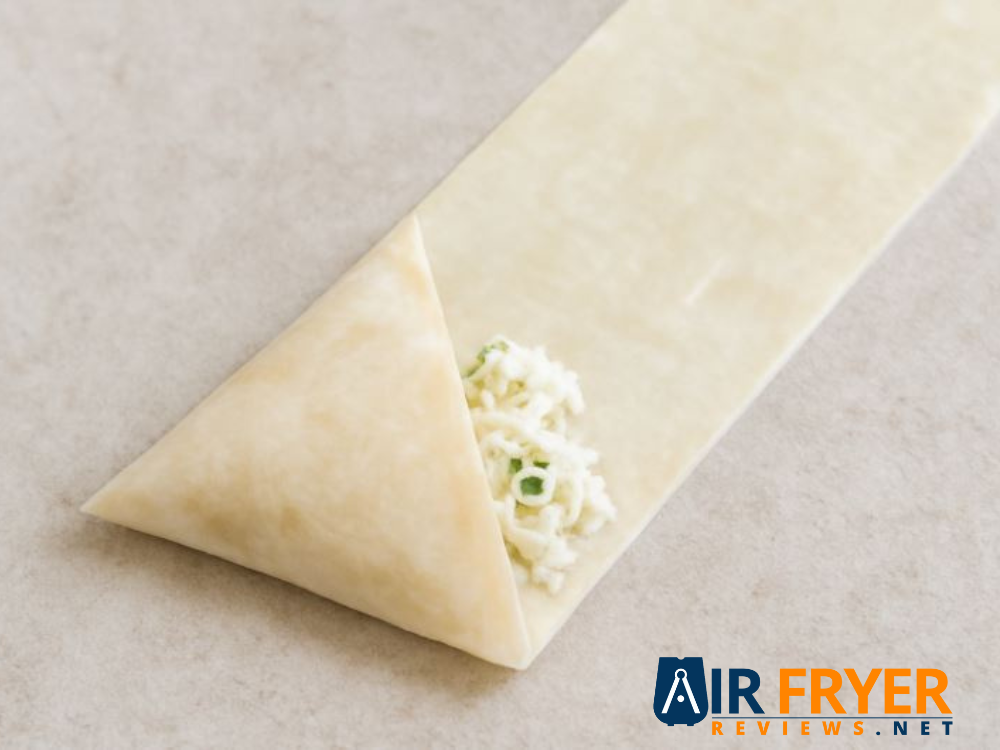
Step 2: Place the Filling
Spoon a small amount (about 1-1.5 teaspoons) of the feta and spinach filling at one end of a phyllo strip positioned about ½ inch from the corner.
Step 3: First Fold (Triangle Shape)
Take the corner of the phyllo strip and fold it over the filling to form a triangle shape bringing the bottom edge up to meet the side edge. Think of it like starting a flag fold.
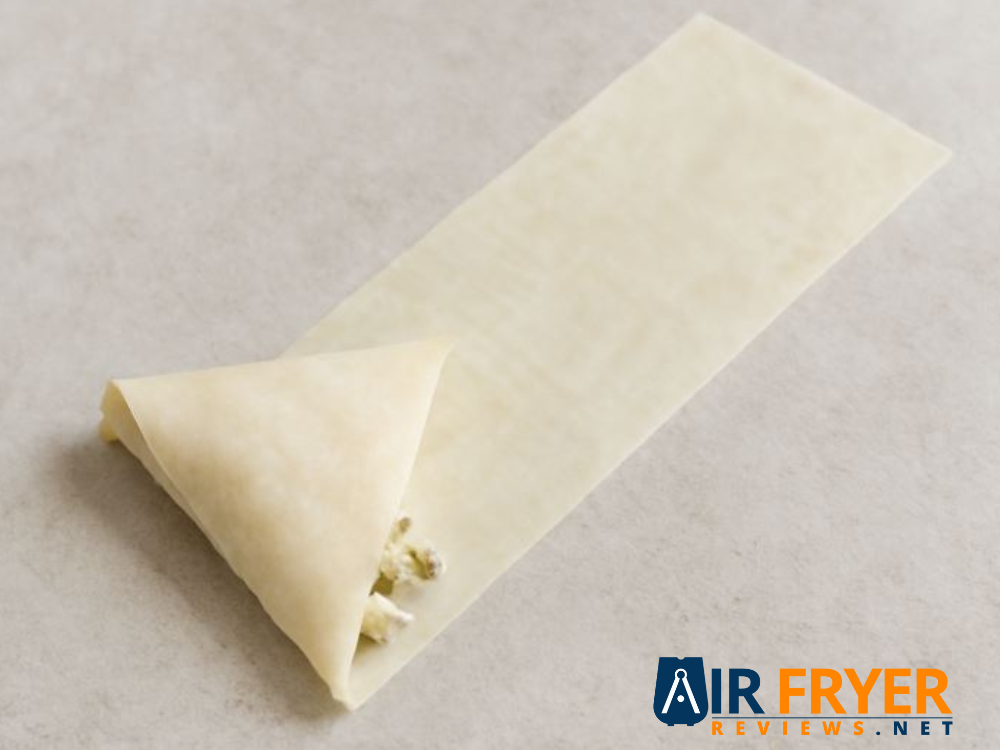
Step 4: Continue Folding
Continue folding the triangle up and over keeping the triangle shape intact until you reach the end of the strip. Each fold should be snug but not too tight so the filling stays enclosed without bursting.
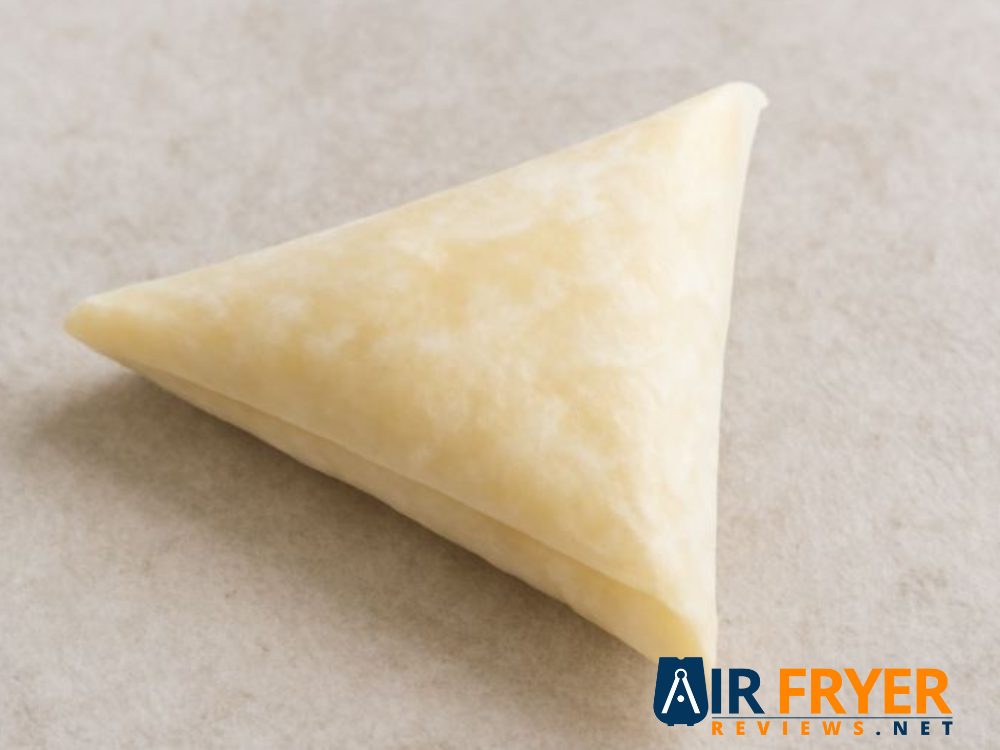
Step 5: Seal the Edges
Expert Tip: Seal the final flap by brushing lightly with the butter/oil mixture and pressing gently. This prevents the filling from oozing during baking and keeps the feta triangles crisp.
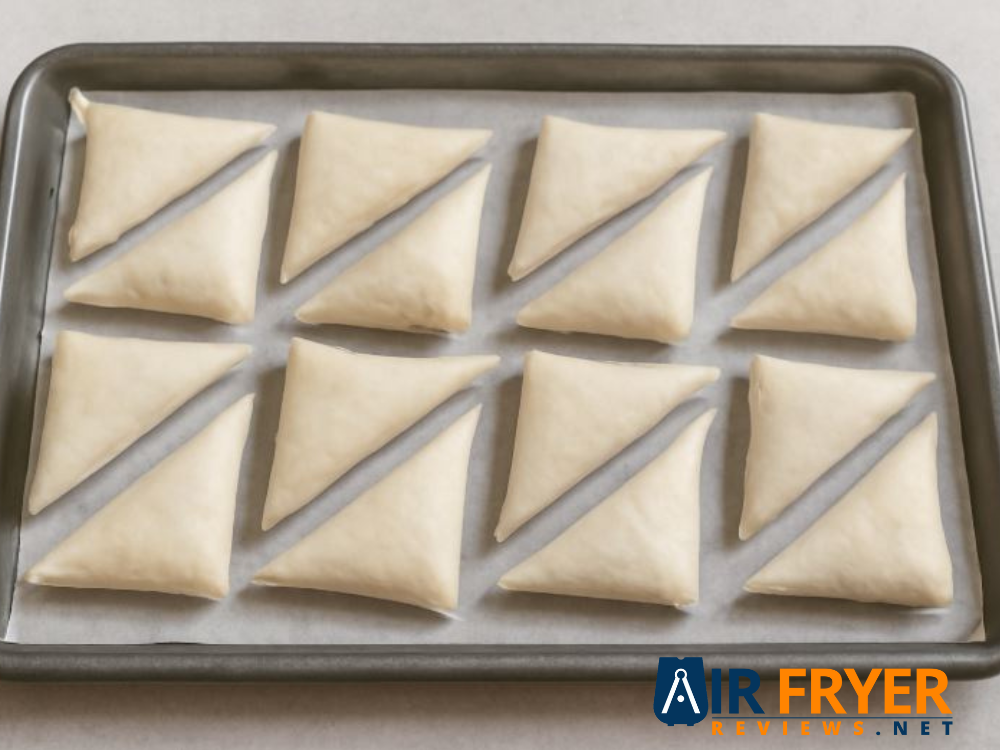
Step 6: Repeat
Place the folded triangle seam-side down on a parchment lined baking sheet. Continue with the remaining strips and filling until all triangles are assembled.
✨ With the folding complete you’re now ready for the final step baking your crispy feta triangles to golden perfection.
Baking for Golden Perfection
✓ Preheat oven Expert tip: Always preheat your oven to 375°F (190°C) before baking. A fully heated oven ensures even cooking and helps the phyllo pastry crisp up from the very beginning.
✓ Arrange & brush. Place the prepared feta triangles seam side down on a parchment lined baking sheet leaving space between each one for airflow. Lightly brush the tops with the remaining butter/olive oil mixture to promote an even golden finish.
✓ Bake until golden. Bake for 20-25 minutes or until the feta triangles are deeply golden brown and crisp all over. Don’t settle for pale coloring going for that rich golden hue maximizes flavor and texture.
✓ Serve warm. Let the triangles rest for 2-3 minutes after removing them from the oven. This allows the filling to settle slightly making each bite perfectly balanced between crispy phyllo dough and warm savory filling.
Achieving Perfection: Expert Tips & Troubleshooting
Even seasoned cooks run into small challenges when working with delicate phyllo dough and savory fillings. These pro tips will help you avoid common mistakes and guarantee the crispiest most flavorful feta triangles every time.
✓ Thoroughly dry spinach. This is the number one rule. Excess moisture from spinach will make your phyllo pastry soggy. Always squeeze fresh or thawed spinach until it’s nearly dry to the touch.
✓ Gentle brushing Expert tip: Brush each sheet of phyllo dough lightly with melted butter or olive oil. Avoid over soaking which can weigh down the pastry and prevent it from crisping properly.
✓ Don’t overfill. Using too much filling makes folding difficult and increases the chance of tearing or leaks. Stick to about 1-1.5 teaspoons of filling per triangle for perfect results.
✓ Seal edges well. To prevent the filling from oozing out always seal the final flap by brushing lightly with the butter/oil mixture and pressing gently. This keeps the feta triangles neat and intact during baking.
✓ Bake until deeply golden. A lightly colored phyllo may look done but won’t have that satisfying crunch. Bake until the feta triangles are a deep golden brown for the best texture and flavor.
✓ Preheat oven thoroughly. Starting with a properly preheated oven at 375°F (190°C) ensures even baking and immediate crisping which is key to avoiding sogginess.
✨ Follow these tips and your crispy feta triangles will turn out perfectly every single time no soggy bottoms no bland bites just pure flaky golden perfection.
Troubleshooting Common Problems
Even with careful preparation a few challenges may pop up when making crispy feta triangles. Here’s how to fix the most common ones:
✓ Soggy phyllo
Problem: The phyllo pastry isn’t crisp or becomes soft shortly after baking.
Solution: Be sure to squeeze spinach completely dry before mixing it into the filling. Brush each phyllo sheet lightly too much butter or olive oil can weigh it down. Always bake in a fully preheated oven and continue until the triangles are a deep golden brown.
✓ Filling leaking out
Problem: The cheese or spinach mixture oozes during baking.
Solution: Don’t overfill use only 1-1.5 teaspoons of filling per triangle.
Expert tip: Seal the final flap with a light brush of butter/oil to keep the feta triangles intact.
✓ Uneven browning
Problem: Some triangles are darker than others or the bottoms aren’t crisp.
Solution: Rotate the baking sheet halfway through cooking. Leave space between each feta triangle so air circulates evenly. Using parchment paper also helps distribute heat consistently.
✓ Phyllo cracking or breaking
Problem: The phyllo dough sheets are brittle and hard to fold.
Solution: Thaw phyllo in the refrigerator overnight and bring to room temperature for 1-2 hours before use. Keep unused sheets covered with a slightly damp towel to prevent drying.
✓ Bland filling
Problem: The filling tastes flat or underwhelming.
Solution: Always taste and adjust before adding the feta. Enhance flavor with fresh herbs like dill or mint a pinch of nutmeg or even a touch of lemon zest for brightness.
✨ With these quick fixes even small setbacks won’t stop you from achieving perfectly crisp flavorful Greek feta triangles.
Beyond the Basics: Variations & Serving Ideas
Once you’ve mastered the classic crispy feta triangle there’s plenty of room to experiment. Try these variations to suit different tastes and dietary needs while keeping that irresistible phyllo crunch.
✓ Herbaceous Delight
Boost the flavor by adding fresh parsley oregano or a touch of dried mint. Each herb gives the filling a unique Mediterranean twist.
✓ Cheesy Blends
Mix feta cheese with grated Kasseri Gruyere or even a little mozzarella for a creamier texture and melt. This adds richness without overpowering the traditional flavor.
✓ Greens Galore
Swap or supplement spinach with other greens like finely chopped leeks blanched kale or Swiss chard. Just remember to squeeze out all moisture to keep the phyllo pastry crisp.
✓ Spicy Kick
Add a pinch of red pepper flakes to the filling for a gentle heat that balances the salty tang of feta cheese.
✓ Gluten Free alternative
Traditional phyllo dough is wheat-based but gluten free phyllo options are available at specialty stores. Results may vary in crispiness so adjust baking time as needed.
✓ Vegan option
Use plant based feta add nutritional yeast for cheesy flavor and replace the egg with a flax egg (1 tbsp ground flaxseed + 3 tbsp water). Brush only with olive oil for a fully vegan version of feta triangles.
✨ Serving Idea: Pair your Greek feta triangles with tzatziki a crisp salad or a mezze platter featuring olives, hummus and grilled vegetables for a complete Mediterranean spread.
Serving Suggestions
These crispy feta triangles are versatile enough to shine at parties family dinners or casual snacking. Here are some delicious ways to enjoy them:
✓ Classic mezze platter
Serve your Greek feta triangles alongside olives, hummus, tzatziki and other Mediterranean dips for a traditional mezze spread.
✓ Dipping sauces
Pair with a creamy yogurt dill dip a spicy feta dip (htipiti) or even a sweet savory fig jam for contrast.
✓ Light lunch or dinner
Complement the flaky triangles with a fresh Greek salad or a warm bowl of lentil soup for a satisfying yet balanced meal.
✓ Wine pairing
Match the salty tangy flavors with a crisp white wine like Assyrtiko or Sauvignon Blanc. A light bodied rosé also works beautifully.
The Feta Triangle Challenge
Ready to take your feta triangles beyond the basics? Try these fun challenges to put your own spin on tradition:
✓ Flavor fusion. Create new fillings such as roasted red pepper with feta or artichoke hearts with spinach.
✓ Shape shifting. Fold them into slim cigar rolls or go big with a spanakopita style pie.
✓ Dip dare. Invent your own signature dipping sauce to serve with your triangles.
✓ Share your creations. Post your masterpieces on social media with Feta Triangle Challenge and join a growing community of flavor explorers.
✨ Whether you serve them as part of a mezze platter pair them with dips or join the Feta Triangle Challenge these golden flaky bites are guaranteed to impress.
Make Ahead & Freezing Strategies
One of the best things about feta triangles is how well they adapt to advance prep. Whether you want to save time before a party or stock your freezer for quick snacks these strategies ensure your crispy phyllo triangles stay golden and delicious.
✓ Preparing in Advance (Unbaked)
Assemble the feta triangles as instructed. Place them in a single layer on a parchment lined baking sheet then cover loosely with plastic wrap. Refrigerate for up to 24 hours before baking.
✨ Differentiation tip: Perfect for busy cooks assemble ahead then simply bake fresh when guests arrive.
✓ Freezing Unbaked Triangles
- Expert tip: Freeze the unbaked phyllo triangles in a single layer on a baking sheet until solid (about 1–2 hours).
- Once frozen, transfer to an airtight freezer bag or container separating layers with parchment paper to prevent sticking.
- Store for up to 3 months.
✓ Baking from Frozen
- Place frozen feta triangles on a parchment lined baking sheet (do not thaw).
- Brush the tops with a little extra olive oil.
- Bake in a preheated oven at 375°F (190°C) for 30-35 minutes or until deeply golden and crisp. Adjust baking time slightly depending on size and filling.
✓ Freezing Baked Triangles
- Allow freshly baked feta triangles to cool completely.
- Arrange in a single layer on a baking sheet and freeze until solid.
- Transfer to an airtight freezer bag or container. Store for up to 1 month.
✓ Reheating Baked Triangles
- Reheat frozen baked triangles in a preheated oven at 350°F (175°C) for 10-15 minutes or until warmed through and crispy.
- Avoid microwaving as it softens the phyllo pastry and ruins the crunch.
✨ With these strategies you can always have crispy feta triangles ready to go perfect for last minute guests party planning or even a quick snack night.
Frequently Asked Questions
✓ Q: Can I use pre crumbled feta?
A: While convenient pre crumbled feta cheese often contains anti caking agents that affect both texture and flavor. For the best results buy a block of authentic Greek feta (ideally brine packed) and crumble it yourself.
✓ Q: My phyllo dough keeps tearing. What am I doing wrong?
A: This is a common issue. Be sure your phyllo dough is fully thawed and brought to room temperature before using. Work quickly but gently and always keep unused sheets covered with a slightly damp towel to prevent drying. Don’t worry about small tears they’ll disappear once baked.
✓ Q: Can I make these without spinach?
A: Absolutely! While spinach and feta triangles are classic you can omit spinach or replace it with other finely chopped well dried greens such as kale leeks or Swiss chard. Roasted vegetables like red peppers also make tasty variations.
✓ Q: How do I store leftovers?
A: Store baked feta triangles in an airtight container at room temperature for up to 1 day or refrigerate for 2–3 days. For best results, reheat in the oven or toaster oven to bring back the crispiness avoid microwaving which softens the phyllo pastry.
✓ Q: What if I don’t have a pastry brush?
A: No brush? No problem. You can use a clean soft kitchen towel or even your fingers to lightly dab the butter/olive oil mixture onto the phyllo sheets. However a pastry brush does provide the most even coverage.
Nutritional Information (per serving, estimated for 1 triangle)
| Nutrient | Amount |
| Calories | 120-150 kcal |
| Total Fat | 8-10 g |
| Saturated Fat | 4-5 g |
| Carbohydrates | 8-10 g |
| Sugars | 0-1 g |
| Protein | 5-7 g |
| Sodium | 200-250 mg |
| Fiber | 1-2 g |
⚠️ Disclaimer: Nutritional values are approximate and may vary depending on ingredient brands portion sizes and preparation methods. Use this as a guideline only.
Final Thoughts / Conclusion
Making crispy feta triangles at home is easier than it seems and the rewards are worth every fold and brush of butter. With flaky phyllo pastry tangy feta cheese and customizable fillings these golden bites are the perfect mix of tradition and versatility.
Whether you’re serving them as part of a mezze platter packing them for a quick lunch or freezing a batch for future gatherings this recipe guarantees flavor and crunch every time. By following the expert tips troubleshooting advice and make ahead strategies in this guide you’ll have the confidence to create Greek feta triangles that rival any taverna.
✨ So, grab your phyllo crumble that feta and get ready to impress friends, family and even yourself with a dish that’s elegant approachable and undeniably delicious.