The Best Fluffy Pancakes recipe you will fall in love with. Full of tips and tricks to help you make the best pancakes.
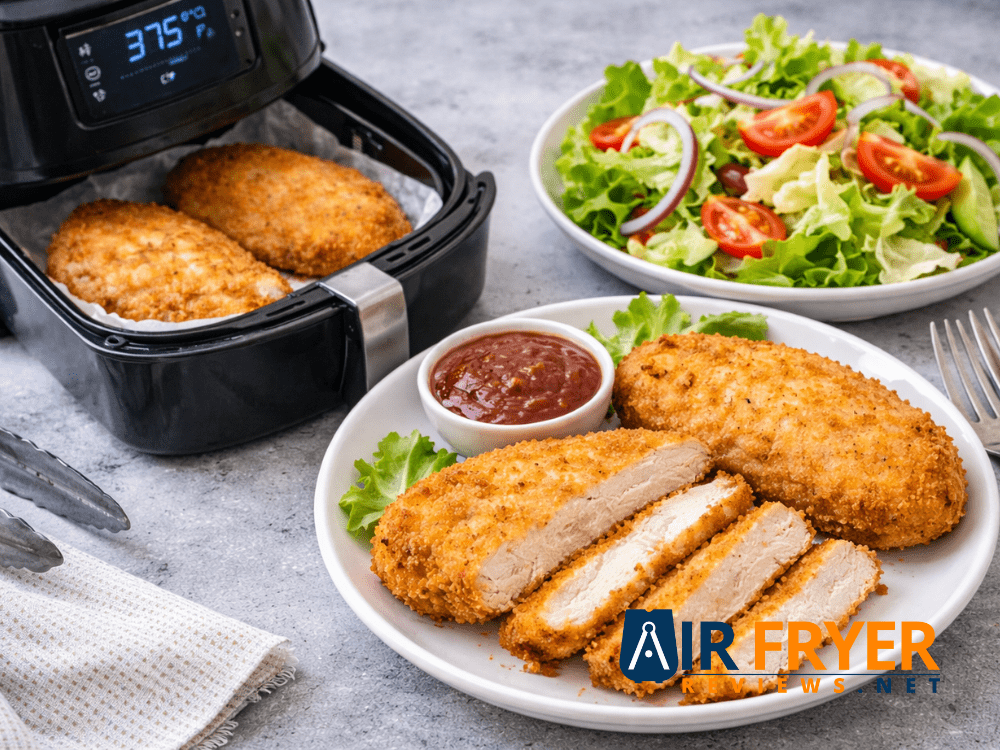
You can cook frozen chicken breast in an air fryer without thawing by using controlled heat and proper timing resulting in a juicy interior and crisp exterior. The key is balancing temperature and checking doneness with a thermometer.
I’ll be honest this wasn’t something I trusted at first.
Cooking chicken straight from frozen felt like a shortcut that would ruin texture. My early attempts proved that too dry edges uneven centers and breading that just wouldn’t crisp properly. But once I started testing different temperatures and timing combinations things changed quickly.
What I found is simple:
The air fryer doesn’t just cook frozen chicken it handles it better than most traditional methods when used correctly.
Now, whether I’m making air fryer frozen breaded chicken breast for a quick meal or plain frozen chicken for meal prep the process is consistent and reliable.
In this guide, I’ll show you:
- Exactly how to cook frozen chicken breast in air fryer (step-by-step)
- When to use higher vs. lower temperatures
- How to get that crisp finish without drying the inside
I’ve also included practical insights I refined through repeated testing along with best-practice techniques commonly used by professional kitchens like proper temperature checks and resting to lock in moisture.
Why Cooking Frozen Chicken Breast in Air Fryer Just Works
Cooking frozen chicken breast in an air fryer works because rapid airflow cooks the outside and inside at the same time eliminating the need to thaw while still delivering juicy meat and a crisp finish. It’s faster cleaner and more reliable than traditional methods.
Skip Thawing Completely (No Extra Steps)
One of the biggest wins here is simplicity.
You don’t need to:
- Wait hours for defrosting
- Use water baths
- Microwave and risk uneven texture
You go straight from freezer to air fryer.
From my experience this alone makes air fry frozen chicken breast one of the most practical weeknight options especially when time is tight.
Faster Cooking, Less Effort
What surprised me during testing wasn’t just speed it was how little effort the whole process takes.
- No prep beyond seasoning
- No extra dishes
- No constant monitoring
Even when making frozen breaded chicken tenders in air fryer the process stays consistent and predictable.
Better Texture Than Oven Cooking
The air fryer solves a common problem: uneven results.
With oven baking you often get:
- Dry edges
- Soft coating
- Inconsistent internal cooking
With air frying:
- The outside crisps evenly
- The inside cooks gradually
- Moisture stays locked in
That’s why crispy frozen breaded chicken air fryer results are much more reliable.
Lighter Cooking Without Extra Oil
Air frying uses circulating heat instead of heavy oil.
That means:
- No deep frying
- No greasy finish
- Cleaner, lighter meals
It’s still satisfying but without the extra heaviness of traditional frying.
What’s Actually Happening (Simple Breakdown)
The reason this method works comes down to airflow.
- Hot air circulates rapidly around the chicken
- The surface begins to crisp
- Heat gradually penetrates to the center
This balance is what prevents:
- Burnt outside
- Undercooked inside
In my testing, this was the biggest difference compared to stovetop or oven cooking.
Food Safety First: Cook Frozen Chicken the Right Way
When cooking chicken especially from frozen there’s one rule you never compromise on always cook it to a safe internal temperature of 165°F (74°C). This isn’t optional or flexible. It’s the standard that ensures your food is safe to eat every single time.
The Golden Rule: 165°F (74°C Internal Temperature)
No matter the method whether you’re making air fryer frozen chicken breast or breaded varieties the chicken must reach 165°F (74°C) at its thickest point.
Why this matters:
- It eliminates harmful bacteria like Salmonella
- It ensures the chicken is fully cooked inside
- It prevents both undercooking and guesswork
Relying on color or texture alone is risky. Chicken can look done on the outside while still being unsafe internally.
How to Check Temperature Properly
Using a thermometer correctly is just as important as using one.
Follow these steps:
- Insert the thermometer into the thickest part of the chicken breast
- Avoid touching bone basket or breading (this gives false readings)
- Check multiple spots if pieces vary in size
If the temperature is below 165°F (74°C):
- Return the chicken to the air fryer
- Cook for another 2-3 minutes
- Check again
Once it reaches temperature:
- Remove immediately
- Let it rest for 2-3 minutes
This short rest allows heat to distribute evenly and keeps the chicken juicy.
Why a Thermometer Is Non-Negotiable
A lot of home cooks still rely on visual signs like:
- No pink inside
- Clear juices
- Firm texture
But these are not reliable indicators anymore.
A thermometer gives you:
- Accuracy
- Consistency
- Confidence
Whether you’re making frozen breaded chicken in air fryer or plain chicken breasts this one tool makes the biggest difference between average and perfectly cooked results.
Pro Insight That Actually Matters
From repeated testing and chef-backed techniques one habit stands out:
- Check temperature after flipping
- Do a final check before removing
Also, if cooking multiple pieces:
- Always test more than one piece
- Sizes cook differently even in the same batch
Safe Handling Practices for Frozen Chicken (Prevent Cross-Contamination)
Before you even turn on the air fryer how you handle frozen chicken matters just as much as how you cook it. Raw poultry can carry surface bacteria and without proper care that bacteria can spread to other foods, utensils and kitchen surfaces.
Why This Step Is Critical
Cross-contamination is one of the most common kitchen mistakes. It happens when raw chicken juices or contact transfer bacteria to foods that won’t be cooked like vegetables, salads or ready-to-eat items.
The goal is simple keep raw chicken completely separate from everything else until it’s fully cooked.
Essential Safety Rules to Follow
These habits should become automatic in your kitchen:
- Keep it separate: Store and carry frozen chicken away from fresh produce and cooked foods. If the packaging is damaged rewrap it securely before freezing.
- Never wash raw chicken: Washing spreads bacteria through water splashes onto sinks, counters and utensils. Cooking will handle bacteria rinsing will not.
- Wash your hands properly: Use soap and water for at least 20 seconds after touching raw chicken or its packaging.
- Clean everything it touches: Cutting boards, knives, plates and countertops should be washed with hot, soapy water immediately after contact.
- Use separate tools if possible: Dedicated or color-coded cutting boards reduce the risk of contamination.
Quick Pre-Cooking Checklist
Before placing chicken in the air fryer run through this quick routine:
- Remove chicken from packaging and place it on a clean plate or surface
- Wash your hands immediately after handling
- Make sure raw juices don’t touch other ingredients or prep areas
Practical Insight
Most food safety mistakes don’t happen during cooking they happen before it even starts.
By controlling:
- where the chicken goes
- what it touches
- and how you clean afterward
you eliminate the biggest risks completely.
Why This Matters (Trusted Guidance You Can Rely On)
Food safety isn’t based on guesswork it’s built on established standards. The recommendations in this guide align with official food safety authorities such as USDA/FSIS guidelines for safe cooking temperatures and proper handling practices.
Following these principles ensures:
- Harmful bacteria are properly eliminated
- Cross-contamination risks are minimized
- You can confidently cook air fryer frozen chicken breast without compromising safety
In simple terms, these rules allow you to save time without cutting corners.
Getting Ready: Ingredients & Essential Equipment
Before you start cooking having everything prepared makes a huge difference. It keeps the process smooth, prevents mistakes and helps you get consistent results every time.
Quick Essentials Checklist
Make sure you have the following ready:
- Frozen boneless, skinless chicken breasts (similar in size)
- Instant-read digital thermometer (must-have)
- Air fryer (basket or oven-style)
- Silicone-tipped tongs
- Oil sprayer (for light coating)
- Optional: air fryer parchment liners
- Basic seasonings: salt, pepper, garlic powder, onion powder (paprika optional)
Choosing the Right Chicken
For best results:
- Use boneless, skinless frozen chicken breasts
- Try to keep pieces similar in thickness
This ensures even cooking especially when making frozen breaded chicken in air fryer or plain frozen breasts.
Simple Seasoning That Works Every Time
You don’t need anything complicated.
A reliable base:
- Salt
- Black pepper
- Garlic powder (~½ tsp per breast)
- Onion powder (~½ tsp per breast)
- Paprika (optional for color and mild flavor)
If you’re using pre-breaded frozen chicken:
- Keep seasoning minimal
- Focus on a light oil spray to improve crispiness
Small Chef-Level Details That Make a Difference
- From testing and expert input a few small tweaks stand out:
- Oil mist helps coatings crisp without making them greasy
- Light seasoning still works on frozen chicken it develops as it cooks
- Adding a pinch of salt under breading edges improves overall flavor balance
Essential Air-Frying Tools (What Actually Matters & Why)
Getting great results with frozen chicken isn’t just about temperature and time it also depends on using the right tools. These aren’t fancy extras they directly impact safety, texture and consistency.
Must-Have Tools Explained
Instant-Read Digital Thermometer (Non-Negotiable)
This is the most important tool in your kitchen for this recipe. It’s the only accurate way to confirm your chicken has reached 165°F (74°C).
Why it Matters:
- Prevents undercooking (safety risk)
- Prevents overcooking (dry chicken)
- Removes all guesswork
Air Fryer (Basket vs. Oven-Style)
- Basket-style:
Best for small batches and faster more concentrated airflow. Great for crispiness. - Oven-style:
Better for larger portions or multiple pieces at once. Ideal if cooking for families.
No matter which you use:
- Always leave space between pieces
- Never stack or overcrowd
Airflow = even cooking + crisp texture.
Silicone-Tipped Tongs
Simple but essential.
They help you:
- Flip chicken safely
- Avoid damaging non-stick coating
- Keep hands away from heat and steam
Oil Sprayer (For Controlled Crisping)
A light mist of oil makes a noticeable difference.
Benefits:
- Better browning
- Crispier exterior
- Prevents sticking
Reusable sprayers are safe because they give control without chemicals.
Air Fryer Parchment Liners (Optional but Useful)
Helpful for cleanup especially with breaded chicken.
Important rules:
- Use only air-fryer-specific perforated liners
- Never block airflow completely
They should assist cooking not interfere with it.
Practical Ingredient & Tool Setup (2-4 Servings)
Chicken & Seasoning
- 2-4 frozen boneless skinless chicken breasts
- Salt (to taste)
- Black pepper (freshly ground)
- Garlic powder (~½ tsp per breast)
- Onion powder (~½ tsp per breast)
- Paprika (optional, ~½ tsp per breast)
Cooking Essentials
- Air fryer (any type properly sized)
- Instant-read thermometer (critical)
- Silicone tongs
- Oil spray (as needed)
- Optional parchment liners
Smart Buying Tips (No Overcomplication)
- Thermometer:
Go for fast response (2-5 seconds). This is your most valuable tool. - Air fryer size:
Cooking for 3-4 people? Bigger basket or oven-style saves time.
Cooking solo? Compact models work perfectly. - Accessories:
Keep it simple good tongs and proper liners are enough.
The No-Fail Method: Air Fry Frozen Chicken Breast (Step-by-Step)
If you follow one method from this guide make it this one. It’s been tested across different air fryers and works consistently for both plain and breaded chicken no guesswork no surprises.
Quick Summary:
- Plain frozen chicken → 375°F (190°C)
- Breaded chicken → 400°F (204°C)
- Always cook until 165°F (74°C internal temp)
Step 1: Prep & Season (Build Flavor First)
Before cooking take a minute to set things up properly.
- Lightly spray frozen chicken with oil
- Season with:
- Salt
- Black pepper
- Garlic powder
- Onion powder
- (Optional) paprika
If using breaded frozen chicken:
- Keep seasoning light
- Focus on oil spray for crispiness
Pro insight: Frozen chicken needs stronger seasoning because flavor develops as it cooks not before.
Step 2: Preheat (Don’t Skip This)
Preheat your air fryer for 3-5 minutes at 375°F (190°C).
Why it matters:
- Starts crisping immediately
- Reduces total cook time
- Prevents soggy texture
Step 3: Arrange Properly (Airflow = Everything)
- Place chicken in a single layer
- Leave space between each piece
- Do not stack
If needed cook in batches.
This is one of the biggest differences between average and perfect results.
Step 4: First Cook Phase
- Air fry for 15-20 minutes (plain chicken)
What’s happening here:
- Interior begins thawing
- Exterior starts browning
Step 5: Flip & Continue Cooking
- Flip each piece
- Cook another 10-15 minutes
Optional:
- Lightly re-season after flipping
Why flipping matters:
- Even browning
- Prevents one side from overcooking
Step 6: Check Temperature (Critical Step)
- Insert thermometer into the thickest part
- Target: 165°F (74°C)
If not ready:
- Cook 2-3 more minutes
- Check again
This is your only accurate doneness check.
Step 7: Rest Before Serving
- Let chicken rest 5-10 minutes
This allows:
- Juices to redistribute
- More tender texture
- Better final result
Timing Variations (Based on Type)
Plain Frozen Chicken Breast
- 375°F → 15-20 min → flip → 10-15 min
Thick Pieces
- Add 3-6 extra minutes
- Always confirm with thermometer
Thin / Cutlets
- Reduce total time to 18-22 minutes
Breaded Chicken (For Extra Crisp)
- 400°F (204°C)
- 10-12 min → flip → 6-10 min
Best for:
- Crispy frozen breaded chicken
- Cutlets, patties, tenders
Chicken Tenders / Strips
- 400°F
- 8-12 minutes total
- Flip once
Mixed Sizes Tip
If cooking different sizes together:
- Remove smaller pieces early
- Check multiple pieces
- Don’t rely on one reading
Final Pro Tips (Game-Changers)
- Thermometer placement: Always check thickest part
- Extra crisp finish:
Increase to 400°F for 2-3 minutes at the end - Avoid guesswork: Visual checks are unreliable
- Storage: Refrigerate within 2 hours reheat to 165°F
Achieving Perfect Doneness: How to Know Your Chicken Is Done
No matter your experience level there’s only one accurate way to confirm perfectly cooked chicken use an instant-read thermometer.
Color, texture or juices might look right but they can easily mislead you. That’s why both home cooks and professional kitchens rely on temperature not guesswork.
How to Check Temperature the Right Way
To get an accurate reading:
- Insert the thermometer into the thickest part of the chicken
- Avoid touching:
- The basket
- Any bone
- The breading layer
- If one side is thicker check multiple points
Your target is simple: 165°F (74°C)
If it’s below that:
- Return to air fryer
- Cook 2-3 more minutes
- Check again
Understanding Chicken Doneness (Visual Guide)

Temperature Stages Explained
- Under 120°F (49°C):
Raw, soft, pink → unsafe - 140-150°F (60-66°C):
Firmer outside, still unsafe inside - 155-160°F (68-71°C):
Almost done but not safe yet - 165°F (74°C):
Fully cooked, safe, juicy → this is your target - 175°F+ (79°C+):
Overcooked → dry texture

Pro-Level Habit (That Changes Everything)
Instead of checking only at the end:
- Do a quick temp check after flipping
- Then a final check before removing
This prevents:
- Overcooking
- Undercooking
Also, if cooking multiple pieces:
- Always check more than one
- Sizes cook differently
Why Resting Your Chicken Matters
Once your chicken hits 165°F don’t cut it immediately.
Let it rest for 5-10 minutes.
What Happens During Resting
- Juices redistribute inside the meat
- Texture becomes more tender
- Internal temperature evens out
If you skip this:
- Juices spill out
- Chicken turns dry quickly
Cooking Time Guide (Based on Size)
Use this as a starting point not a final rule.
| Size | Temp | Time | Target |
|---|---|---|---|
| Small (4-5 oz) | 375°F | 20-25 min | 165°F |
| Medium (6-8 oz) | 375°F | 25-30 min | 165°F |
| Large (9-12 oz) | 375°F | 30-35 min | 165°F |
| Extra Large | 375°F | 35-45 min | 165°F |
For Breaded Chicken
- Cook at 400°F (204°C)
- 10-12 min → flip → 6-10 min
This gives:
- Better crispiness
- Faster cooking
Always confirm with a thermometer.
Important Final Note
These times are guidelines only.
Real results depend on:
- Thickness
- Air fryer model
- Quantity in basket
If chicken is very thick:
- This ensures even cooking and better texture
- Slice into thinner cutlets
How These Results Were Tested (Transparent Methodology)
The cooking times and recommendations in this guide aren’t random they come from repeated real-world testing.
- Multiple chicken sizes and thicknesses were tested
- Both basket-style and oven-style air fryers were used
- Each method was repeated to find consistent averages
The focus was always on:
- Safe internal temperature
- Juicy texture (not dry)
- Reliable results across different machines
That said, air fryers are not identical.
Results can vary based on:
- Wattage (higher wattage = faster cooking)
- Preheating behavior
- Basket size and how full it is
Important: Always treat time as a guide but your thermometer as the final authority.
Troubleshooting Guide (Fix Problems Fast)
Here’s how to fix the most common issues with the exact reason behind each one.
Dry or Rubbery Chicken
Fix:
- Remove at exactly 165°F (74°C)
- Let it rest for 5-10 minutes
Why it Happens:
Overcooking removes internal moisture. Resting allows juices to redistribute instead of escaping.
Uneven Cooking (Burnt Outside, Cold Inside)
Fix:
- Keep a single layer (no overcrowding)
- Flip halfway
- For thick pieces → slice or pound evenly
Why it Happens:
Blocked airflow + uneven thickness = inconsistent heat distribution.
Chicken Sticking to Basket
Fix:
- Lightly spray oil on chicken and basket
- Use silicone tongs
- Optional: use air fryer liners (don’t block airflow)
Why it Happens:
Without oil surfaces stick directly to hot metal.
Bland Flavor
Fix:
- Season generously before cooking
- Add light seasoning after flipping
- Use finishing salt or sauce at the end
Why it Happens:
Frozen chicken doesn’t absorb flavor immediately seasoning builds as it cooks.
Outside Burning Too Fast
Fix:
- Lower temperature (around 350°F / 175°C)
- Cook longer
- Loosely cover with foil if needed
Why it Happens:
High heat cooks the outside faster than the inside can catch up.
Soggy Coating (Breaded Chicken)
Fix:
- Finish at 400°F for 2-3 minutes
- Avoid opening basket too often
Why it Works:
High heat at the end triggers crisping (Maillard reaction).
Mixed Sizes Cooking Unevenly
Fix:
- Group similar sizes together
- Remove smaller pieces early
- Check multiple pieces
Why it Happens:
Different sizes cook at different speeds.
Small Adjustments That Make a Big Difference
These are the details most people ignore but they change results completely:
- Always preheat (3-5 minutes) → better browning
- Flip halfway → even cooking on both sides
- Use a thermometer → removes all guesswork
- Finish hot (400°F) → extra crisp for breaded items
- Position smartly:
- Thicker pieces in center
- Thinner pieces on edges
Batch Cooking Tip
If you’re cooking multiple pieces:
- Never stack
- Cook in batches instead
Yes, it takes slightly longer but:
- Texture stays crisp
- Cooking stays even
Elevate Your Meals: Flavor Variations & Serving Ideas
Once you’ve mastered cooking frozen chicken in the air fryer the next step is turning it into something exciting. The real difference comes from how you season and serve it that’s what transforms simple chicken into a full satisfying meal.
Flavor Boost: Easy Seasoning Blends
These are reliable tested combinations you can use as a base. Adjust quantities to your taste.
Classic Herb (Balanced & Comforting)
Blend:
- Parsley, thyme, rosemary, oregano
- Garlic powder, onion powder
- Salt, black pepper
Best with:
Roasted vegetables, mashed potatoes, creamy sauces
Smoky Southwest (Bold & Warm)
Blend:
- Chili powder, cumin, smoked paprika
- Garlic powder, onion powder
- Pinch of cayenne, salt, pepper
Best with:
Tacos, burritos, rice bowls, corn salsa
Zesty Lemon-Garlic (Fresh & Light)
Blend:
- Lemon zest
- Garlic powder
- Dried dill
- Salt, black pepper
Best with:
Green beans, asparagus, quinoa, salads
Spicy Sriracha-Honey (Sweet Heat)
Blend:
- Garlic powder, ginger powder
- Salt
- Finish with sriracha + honey glaze
Best with:
Rice noodles, lettuce wraps, Asian-style bowls
Italian Herb (Classic & Versatile)
Blend:
- Basil, oregano, marjoram, thyme
- Garlic powder
- Red pepper flakes (optional)
- Salt, black pepper
Best with:
Pasta, sandwiches, tomato-based dishes
How to Apply Seasoning (Important Difference)
For Plain Frozen Chicken
- Lightly spray oil
- Season before cooking
- After flipping → add a light extra layer
- Finish with:
- Lemon juice
- Fresh herbs
For Breaded Frozen Chicken
- Avoid heavy dry seasoning (can burn)
- Use:
- Light oil spray before cooking
- Sauces or herbs after cooking
For extra crisp:
- Finish at 400°F for 1–2 minutes
- Then add glaze or toppings
Quick Serving Ideas (Ready in Minutes)
Once your chicken is cooked, here’s how to turn it into a full meal fast:
- Rice Bowl:
Chicken + rice + veggies + sauce - Wraps or Tacos:
Slice chicken + tortillas + toppings - Salad Topper:
Add sliced chicken over greens + dressing - Sandwich:
Breaded chicken + bun + sauce + lettuce
Pro-Level Finishing Touch (Simple but Powerful)
Right before serving, always add one of these:
- Fresh herbs (parsley, basil)
- Lemon juice or vinegar
- Light drizzle of sauce
This step alone makes the dish taste fresh, balanced, and complete.
If Flavor Feels “Flat” (Quick Fixes)
- Add a pinch of salt after cooking
- Add acid (lemon or vinegar)
- Add a sauce or glaze
- Re-season lightly while hot
How to Apply Seasoning (The Right Way for Frozen Chicken)
Seasoning frozen chicken isn’t just about what you use—it’s about when and how you apply it. Done correctly, flavor builds as the chicken cooks instead of sitting on the surface.
For Plain Frozen Chicken Breasts
Best approach: build flavor in layers
- Lightly mist with oil
- Season generously before air frying
- Flip halfway → add a light extra sprinkle if needed
- After resting → finish with:
- Lemon juice
- Fresh herbs
Why this works:
As the chicken cooks and thaws, the seasoning starts to absorb gradually—giving you deeper, more balanced flavor.
For Breaded Frozen Chicken
Keep it simple before cooking—finish strong after
- Light oil spray before cooking (for crispiness)
- Avoid heavy dry rubs (they can burn)
- After cooking → add:
- Sauces (like sriracha-honey)
- Fresh herbs
- Finishing salt
For extra crunch:
- Increase to 400°F for 1–2 minutes at the end
- Then add sauces or toppings
If You Prep Chicken Before Freezing (Advanced Tip)
Small prep steps make a big difference later:
- Add light seasoning before freezing
- Place seasoning into natural seams of the meat
- Optional: freeze with lemon slice or herbs
Result:
Flavor develops from the inside out while cooking.
Quick Meal Ideas (Turn Chicken Into Full Meals Fast)
Once your chicken is ready, here are fast ways to serve it without extra effort:
Classic Weeknight Plate
- Chicken + mashed potatoes + vegetables
- Finish with parsley or herb butter
Southwest Rice Bowl
- Sliced chicken + rice + black beans + salsa + avocado
- Works great with bold seasoning
Crispy Chicken Sandwich
- Breaded chicken + toasted bun + sauce + lettuce + pickles
- Add lemon or hot sauce for balance
Lemon-Garlic Light Meal
- Chicken + quinoa or farro + greens
- Finish with lemon zest and herbs
Asian-Style Lettuce Wraps
- Chopped chicken + sriracha-honey glaze
- Add carrots + cucumber + lettuce
Salad Topper (Meal Prep)
- Sliced chicken over greens
- Add nuts + dried fruit + vinaigrette
Pro Tip That Instantly Improves Flavor
No matter the dish, always add one final touch:
- Acid (lemon, vinegar)
- Fresh herbs
- Light sauce
This step makes the chicken taste fresh—not flat.
Dips, Sauces & Finishing Touches (Mix & Match Like a Pro)
Once your chicken is cooked, this is where you take it from “good” to restaurant-level. A simple sauce or finishing touch can completely change the flavor without adding extra cooking time.
Easy Go-To Sauces
Garlic-Herb Yogurt Sauce
- Greek yogurt + garlic powder + lemon juice + parsley
- Creamy, fresh, and perfect for lighter meals
Honey Mustard
- Dijon mustard + honey + splash of apple cider vinegar
- Sweet, tangy, and works with everything
Sriracha-Honey Glaze
- Sriracha + honey + soy sauce
- Brush on after cooking for a sticky, spicy finish
Chimichurri (Fresh & Bold)
- Parsley + oregano + garlic + olive oil + red wine vinegar
- Bright, herby, and perfect for sliced chicken
Pro Finishing Tip (Game-Changer)
Right before serving, always add:
- A squeeze of lemon or
- A splash of vinegar + fresh herbs
This instantly:
- Brightens flavor
- Balances richness
- Makes chicken taste fresh instead of heavy
Quick Flavor Fixes (If Something Feels Off)
Tastes bland?
- Add a light sprinkle of seasoning after flipping
- Flavor sticks better when the surface starts thawing
Too salty (especially breaded)?
- Balance with:
- Lemon juice
- Fresh herbs
- Mild sauces
Coating not crispy?
- Air fry at 400°F for 1–2 minutes
- Then add a dry finishing spice (like paprika)
Snack & Kid-Friendly Ideas
Tenders + Dip Station
Serve chicken tenders with multiple sauces:
- BBQ
- Honey mustard
- Ranch
- Sweet chili
Perfect for:
- Kids
- Guests
- Quick snacks
Quick Chicken Parmesan Upgrade
- Take cooked breaded chicken
- Add marinara + mozzarella
- Broil or air fry 1–2 minutes until melted
Result:
- Fast, crispy, cheesy meal
- No extra prep needed
From Frozen to Feast: Smart Serving & Meal Prep Ideas
Cooking frozen chicken is just step one—what really makes it valuable is how easily you can turn it into multiple meals throughout the week. With a little planning, one batch can cover dinners, lunches, and even quick snacks.
Easy Meal Ideas (Ready in Minutes)
Chicken Caesar Salad
Slice or dice cooked chicken and toss with romaine, croutons, Parmesan, and Caesar dressing.
Quick tip: Give the chicken 1–2 minutes at 400°F before slicing for a light char and better texture.
Chicken & Veggie Bowls
Serve sliced chicken over rice or quinoa with roasted vegetables and a drizzle of sauce.
Quick tip: Prep grains and veggies ahead—assemble in under 5 minutes.
Sandwiches & Wraps
Use sliced or shredded chicken in wraps, pitas, or sandwiches with sauces and fresh veggies.
Quick tip: Mix shredded chicken with yogurt or mayo + herbs for an instant chicken salad.
Pasta with Chicken & Pesto
Combine diced chicken with pasta, pesto, tomatoes, and a squeeze of lemon.
Quick tip: Add a little pasta water to create a smooth, glossy sauce.
Chicken Street Tacos
Shred or dice chicken, add tortillas, salsa, onion, cilantro, and lime.
Quick tip: Warm tortillas in the air fryer for 30–45 seconds.
Quick Sheet-Pan Meal
Combine sliced chicken, potatoes, and green beans for a one-plate meal.
Quick tip: Pre-cook potatoes to match chicken timing.
Salad Topper (Meal Prep Friendly)
Add sliced chicken to salads for quick lunches.
Quick tip: Keep dressing separate to maintain freshness.
Kids’ Tenders + Dip Plate
Serve breaded chicken with multiple dips.
Quick tip: Reheat at 350°F for 3–5 minutes to restore crispiness.
Simple Meal Prep System (30–60 Minutes)
- Cook a large batch of chicken
- Divide into:
- 1 immediate meal
- 2–3 lunches
- 1–2 snack portions
- Store components separately (chicken, carbs, veggies, sauces)
This keeps everything fresh and flexible.
Storage & Reheating Guide
Refrigerator:
- 3–4 days (airtight container)
Freezer:
- Up to 3 months
Reheat (Best Method):
- Air fryer at 350°F for 3–6 minutes
Microwave (Backup):
- Heat in short bursts
- Then crisp in air fryer or pan
Important: Always reheat to 165°F (74°C)
Smart Storage Tips
- Cool chicken within 2 hours before refrigerating
- Store sauces separately
- Add fresh herbs or lemon after reheating for better flavor
Repurpose Leftovers (Save Time)
- Use same chicken for:
- Bowls → next day tacos
- Sandwiches → next day salads
- Shred leftovers for:
- Quesadillas
- Pizza toppings
- Stuffed vegetables
One cook → multiple meals.
Small Tricks That Make a Big Difference
Finish strong: Add lemon, herbs, or finishing salt
Thin slices: Reheat faster
Chunks: Better for salads and bowls
Flash crisp: 1–2 minutes at 400°F restores crunch
Frequently Asked Questions (FAQs)
Here are clear, practical answers to the most common questions about cooking frozen chicken in the air fryer—focused on safety, texture, and real-world cooking.
Can I cook bone-in frozen chicken breast in the air fryer?
Yes, but it takes longer.
- Bone-in chicken cooks more slowly
- You’ll need extra time and more frequent temperature checks
- Always confirm the thickest part reaches 165°F (74°C)
Better method:
Start at a slightly lower temperature (around 360°F), then increase heat at the end for browning.
Do I need to thaw chicken before air frying?
No—thawing is not required.
The air fryer is designed to cook directly from frozen. Just:
- Add a few extra minutes for thicker pieces
- Follow the same method
This is what makes it so convenient for quick meals.
How do I keep chicken from drying out?
This comes down to three things:
- Remove at exactly 165°F (74°C)
- Don’t overcook beyond that point
- Let it rest for 5–10 minutes
Skipping the rest step is one of the biggest reasons chicken turns dry.
What if my air fryer doesn’t have a preheat option?
No problem.
- Turn it on empty
- Let it run for 3–5 minutes at your cooking temperature
Preheating helps:
- Even cooking
- Better browning
- More predictable timing
Can I cook multiple pieces at once?
Yes—but only if done correctly.
- Keep everything in a single layer
- Leave space between pieces
- Avoid stacking
If your air fryer is small:
- Cook in batches
- Keep finished pieces warm in a low oven (200°F / 93°C)
How do I store and reheat leftovers?
Storage:
- Fridge: 3–4 days (airtight container)
- Freezer: Up to 3 months
Reheating (best method):
- Air fryer at 350°F for 3–6 minutes
Alternative:
- Microwave (quick) → then air fryer for 1–2 minutes to restore texture
Always reheat to 165°F (74°C) before eating.
Final Thoughts: Your Air Fryer Advantage
Cooking frozen chicken in the air fryer isn’t just convenient—it’s one of the most reliable methods once you understand the basics.
When you follow these core principles:
- Preheat properly
- Season well
- Avoid overcrowding
- Flip halfway
- Check internal temperature
…you remove almost all the common mistakes.
The result is consistent:
- Juicy inside
- Crisp outside
- Fully cooked every time
What You Can Do Now
You don’t need complicated recipes or extra prep.
With this method, you can:
- Turn frozen chicken into quick meals
- Save time on busy days
- Build multiple dishes from one batch
Once you try it a few times, it becomes second nature—and one of the most useful techniques in your kitchen.
