The Best Fluffy Pancakes recipe you will fall in love with. Full of tips and tricks to help you make the best pancakes.
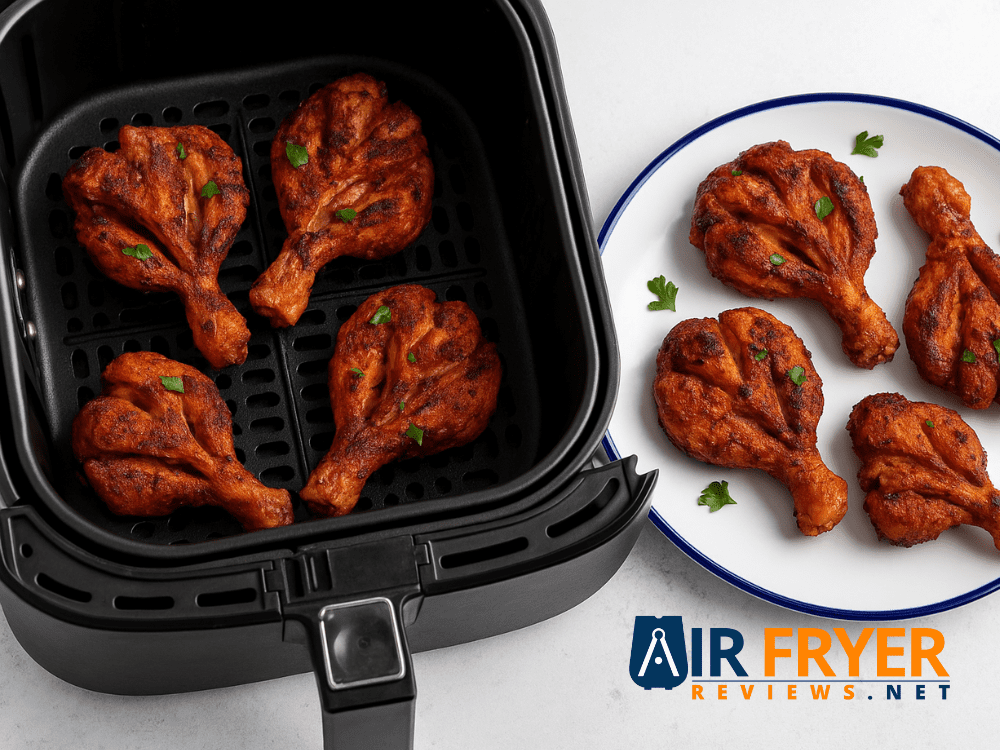
Perfectly cooked air fryer chicken drumsticks should be crisp on the outside and juicy inside. However, many home cooks end up with pieces that are dry, unevenly cooked or lacking in texture. These are common challenges and even experienced air fryer users face them.
I’ve tested countless batches over the years and the results didn’t always match the promise of effortless golden perfection.
One simple way to improve results is by adjusting the shape of the drumstick itself. This is where butterflying comes in. It’s a small preparation step that opens up the meat allowing hot air to circulate more efficiently. The result is faster more even cooking and skin that turns nicely crisp.
Butterflying also helps solve two major issues undercooked areas near the bone and dryness caused by overcooking thick drumsticks. Based on professional cooking techniques this method consistently produces more tender and evenly cooked chicken.
With a few practical steps and the right approach you can master this technique and improve your results. Think of this as your foundation for making air fryer chicken drumsticks that are crisp, juicy and consistently reliable.
The Secret to Air Fryer Drumstick Perfection: Why Butterflying Changes Everything
Butterflying chicken drumsticks helps them cook faster, crisp better and stay juicy by creating a flatter shape that allows hot air to circulate evenly. This simple prep step improves texture reduces cooking time and prevents undercooked spots near the bone.
Butterflying is one of the most effective yet often overlooked techniques for preparing air fryer chicken drumsticks. It reshapes the drumstick in a way that supports faster cooking, better flavor absorption and more consistent crispiness.
Below is how this technique improves your results.
Faster, More Even Cooking
Opening the drumstick reduces its thickness and increases surface area. In the air fryer this creates a flatter piece of meat that cooks more evenly from edge to bone.
This helps avoid:
- Undercooked spots near the bone
- Overcooked or dry outer edges
- Uneven texture
The circulating hot air can move freely around the meat making results more predictable especially when following standard time and temperature guidelines.
From my testing, butterflied drumsticks cook more consistently without needing constant adjustments.
Better Crispiness on the Skin
One of the biggest advantages of butterflying is increased skin exposure. More exposed skin means more contact with hot air which is key for achieving a crisp finish.
This works because of the Maillard reaction the browning process that creates a golden slightly crunchy exterior. When the skin is spread out instead of folded it crisps more evenly.
If your goal is properly crisp chicken without heavy oil or breading this step makes a noticeable difference.
Improved Flavor Absorption
Butterflying exposes more of the meat allowing seasonings and marinades to reach deeper instead of sitting only on the surface.
This means:
- Spices stick better
- Marinades absorb faster
- Flavor is more evenly distributed
Even simple seasoning blends taste more balanced because they’re not blocked by dense compact meat.
Juicier More Tender Results
Dry chicken usually happens when the outside cooks too quickly while the inside takes longer to heat through. Butterflying reduces this gap by creating a more uniform thickness.
As a result:
- The meat cooks evenly
- Less moisture is lost
- The final texture stays tender
When combined with the right temperature and timing this method helps you avoid both dryness and undercooking.
Why This Technique Works
Butterflying simplifies the cooking process by removing guesswork. Instead of adjusting time repeatedly or worrying about uneven results you’re working with a shape that naturally cooks better in an air fryer.
In practice, this small step consistently leads to:
- Crispier skin
- Even cooking
- Better flavor
- Juicier meat
Myth vs. Reality: Debunking Common Butterflying Misconceptions
Butterflying chicken drumsticks is simple, beginner-friendly and improves cooking results by making the meat more even and easier to crisp. Most concerns come from misconceptions not actual difficulty or downsides.
Butterflying is one of the most effective ways to improve air fryer chicken drumsticks yet many home cooks hesitate because of common myths. Let’s clear them up so you can cook with more confidence.
Myth 1: It’s too difficult or messy
Reality: It’s much easier than it sounds.
With a sharp knife and a steady grip butterflying takes just a couple of minutes. You simply make a controlled cut along the bone to open the drumstick.
- No advanced knife skills needed
- Quick to learn
- Easy to repeat
In my experience once you try it once or twice it becomes part of your normal prep routine.
Myth 2: It’s unnecessary because air fryers cook evenly
Reality: Air fryers help but shape still matters.
Drumsticks naturally have uneven thickness, which can lead to:
- Undercooked areas near the bone
- Overcooked or dry outer parts
Butterflying fixes this by creating a more uniform shape allowing heat to reach all parts evenly. This makes your cooking more reliable especially when using higher temperatures.
Myth 3: It makes the chicken look unappetizing
Reality: The final result actually looks better.
While the raw shape may look different once cooked:
- The skin crisps more evenly
- The color becomes deeper and more golden
- The texture looks more uniform
Instead of uneven browning or soft spots you get a cleaner more appetizing finish.
Why This Matters
Understanding these points removes hesitation and helps you use the technique with confidence.
Butterflying isn’t just a prep trick it’s a practical way to:
- Improve texture
- Reduce cooking mistakes
- Get more consistent results
Once you start using it you’ll notice the difference in both appearance and taste.
Gearing Up: Essential Tools & Ingredients for Success
The right tools make butterflying easier, improve safety and help your air fryer cook drumsticks more evenly and consistently. With a few basic items, you can simplify prep reduce mistakes and get better texture every time.
Preparing butterflied air fryer chicken drumsticks becomes much more efficient when you have the right setup. Good tools support cleaner cuts even seasoning and reliable cooking results without adding complexity.
Your Air Fryer Arsenal: Must-Have Kitchen Tools
Air Fryer (Size & Style Matters)
The size and type of air fryer directly affect how evenly your drumsticks cook.
- 3.7 QT models: Suitable for small batches (about 4-6 drumsticks)
- 5.8 QT or larger: Better for families or batch cooking without overcrowding
- Drawer-style: Strong airflow and easy handling
- Oven-style: More space and multiple rack options
From my experience overcrowding is one of the biggest reasons drumsticks don’t crisp properly so choosing the right size really matters.
Also, always start with a clean basket leftover residue can affect airflow and reduce crispiness.
Sharp Boning Knife
A sharp boning knife makes butterflying easier and safer.
- Thin, flexible blade follows the bone easily
- Creates clean cuts without tearing the meat
- Reduces slipping compared to dull knives
A clean cut not only improves safety but also helps the drumsticks cook more evenly.
Instant-Read Meat Thermometer
This is one tool you should not skip.
- Ensures chicken reaches 165°F (safe internal temperature)
- Prevents overcooking and dryness
- Removes guesswork completely
When I started using a thermometer regularly the consistency of my results improved immediately.
Large Mixing Bowl
A mixing bowl helps you coat the drumsticks evenly.
- Distributes seasoning properly
- Keeps marinades and spices well combined
- Ensures full coverage after butterflying
Even seasoning makes a noticeable difference in flavor.
Kitchen Tongs
Tongs give you better control when cooking.
- Safe flipping without damaging the skin
- Easy removal from the hot basket
- Useful for coated or marinated drumsticks
They’re simple but make the process much smoother.
Cutting Board with Juice Groove
A stable cutting board improves safety during prep.
- Prevents slipping while cutting
- Collects juices from raw chicken
- Keeps your workspace cleaner
This is especially helpful when butterflying multiple pieces.
Air Fryer Parchment Liners (Optional)
These are useful but not required.
- Help prevent sticking
- Make cleanup faster
- Useful for marinated or coated drumsticks
Just make sure airflow isn’t blocked perforated liners work best.
Fresh & Flavorful: Ingredient Checklist
Using fresh chicken a light amount of oil and balanced seasoning helps you achieve crispy skin and juicy meat in the air fryer. Simple, quality ingredients respond best to high heat and make a noticeable difference in both texture and flavor.
Good results start with the basics. When your ingredients are fresh and properly seasoned, butterflied drumsticks cook more evenly and develop better crispiness without extra effort.
Key Ingredients
Chicken Drumsticks
Fresh, bone-in, skin-on drumsticks give the best results.
- Better flavor and texture
- Skin crisps more effectively
- Holds moisture during cooking
These are ideal for both simple seasoning and coated variations.
Cooking Oil (Light Spray or Drizzle)
A small amount of oil helps with browning and crispiness.
- Promotes even color
- Supports crisp skin
- Prevents dryness
Recommended oils:
- Avocado oil
- Olive oil
- Grapeseed oil
From my testing a light spray works better than heavy coating too much oil can reduce crispiness.
Seasoning Essentials
Balanced seasoning becomes even more effective after butterflying as it reaches more of the meat.
- Kosher or sea salt
- Black pepper
- Paprika
- Garlic powder
- Onion powder
- Cayenne pepper (optional)
These basics work across different flavor styles whether you prefer mild, savory or slightly spicy drumsticks.
Mise en Place Checklist
A simple prep setup helps you cook faster, safer and more consistently. Having everything ready before you start prevents mistakes and keeps the process smooth.
Before You Begin:
- Preheat your air fryer (if required)
- Gather all spices and oil
- Set up your cutting board and knife
- Keep a mixing bowl ready for seasoning
- Place tongs within reach
- Have your meat thermometer ready
This setup makes handling and cooking much easier especially when working with raw chicken that follows or even when making bread rolls with potato stuffing.
Mastering the Butterfly Cut: A Step-by-Step Guide
Butterflying a drumstick means cutting along the bone and opening the meat so it lays flatter. This improves airflow helps the chicken cook evenly and makes it easier to achieve a crisp exterior without drying out the inside.
Preparing chicken drumsticks for butterflying requires care, cleanliness and a bit of confidence. Once you understand the process it becomes a quick and reliable step that improves your overall results.
Safety First: Preparing Your Workspace
Before handling raw chicken set up your workspace properly. This makes the process safer and more controlled.
- Cleanliness is key: Wash and sanitize your hands, knife and cutting board
- Stabilize your board: Place a damp towel or non-slip mat underneath
- Avoid cross-contamination: Keep raw chicken separate from other ingredients
A well-prepared setup makes the cutting process smoother and reduces mistakes.
The Art of the Cut: Detailed Butterflying Instructions


Step 1: Locate the Bone
Place the drumstick skin-side up on your cutting board. Run your fingers along the thicker side to locate the bone.
This helps guide your cut and keeps it controlled.
Step 2: Make the Initial Incision
Using a sharp knife make a lengthwise cut along the bone.
- Cut steadily, without forcing the blade
- Stop once you reach the bone
A sharp knife gives better control and makes the process safer.
Step 3: Butterfly Open
Open the cut gently like a book.
- Guide the knife along both sides of the bone
- Spread the meat outward
- Let the drumstick flatten naturally
This shape allows heat to circulate more evenly during cooking.
Step 4: Trim Excess (Optional)
Remove any thick fat pockets if needed.
- Keep most of the skin intact
- Skin is essential for crispiness
This small adjustment can improve the final texture.
Step 5: Pat Dry Thoroughly
Pat the drumsticks completely dry using paper towels.
- Removes surface moisture
- Helps the skin crisp better
- Prevents steaming
I’ve found that properly drying the chicken is one of the key steps that improves crispiness.
Flavor First: Seasoning Your Butterflied Drumsticks
Proper seasoning starts with a dry surface a light oil coating and even spice distribution. These steps help the skin crisp better and allow flavors to penetrate more evenly during cooking.
Seasoning is where butterflied drumsticks truly come to life. With more exposed surface area the meat holds seasoning better making each bite more flavorful and balanced.
Pat Dry, Always
Drying the drumsticks is essential for crispiness.
- Moisture blocks browning
- Prevents proper crust formation
- Interferes with even cooking
Use paper towels to press firmly and remove as much surface moisture as possible. I’ve noticed that skipping this step almost always leads to softer skin instead of a crisp finish.
Light Oil Coating
A small amount of oil helps seasoning stick and improves browning.
- Supports even color
- Helps spices adhere
- Enhances crisp texture
Use high smoke-point oils like:
- Avocado oil
- Grapeseed oil
- Olive oil (light coating)
A light spray works best too much oil can make the surface heavy instead of crisp.
Generous Even Seasoning
Apply seasoning evenly across the entire surface.
- Covers more area after butterflying
- Improves flavor in every bite
- Prevents bland spots
Basic seasoning works well:
- Salt
- Black pepper
- Garlic powder
- Paprika
Because the meat is opened up the seasoning distributes more effectively compared to whole drumsticks.
Beyond the Surface: Getting Flavor Deep into the Meat
To get deeper flavor season under the skin, use salt properl and allow time for spices or marinades to absorb. These steps help flavor move beyond the surface and improve both taste and texture.
Butterflying already opens up the meat this gives you a great opportunity to build flavor more effectively than with whole drumsticks.
Season Under the Skin
After butterflying, gently lift sections of the skin and apply seasoning directly onto the meat.
- Improves flavor from the inside
- Prevents seasoning from staying only on the surface
- Makes each bite more balanced
This is one of the biggest advantages of butterflying it exposes areas that are normally sealed.
The Power of Salt
Salt does more than add taste it improves texture.
When applied properly it draws out a small amount of moisture which then gets reabsorbed back into the meat. This creates a light natural brining effect.
This helps:
- Season the meat more deeply
- Improve tenderness
- Retain juiciness
- Support better browning
A simple step like salting ahead of time can noticeably improve the final result.
Spices for Aroma & Depth
Each spice plays a role in building flavor:
- Paprika: Adds color and mild sweetness
- Garlic powder / Onion powder: Brings savory depth
- Cayenne: Adds a mild kick
- Black pepper: Enhances overall flavor balance
You can adjust combinations based on your preference but even simple blends work well when applied evenly.
Marinades for Maximum Impact (Optional)
Marinating can take flavor a step further.
- Helps spices penetrate deeper
- Softens the meat slightly
- Adds moisture and richness
For best results:
- Marinate for at least 30 minutes (or longer if time allows)
- Pat the surface lightly before cooking to avoid excess moisture
I’ve had better results when I lightly dry marinated drumsticks before air frying it helps bring back that crisp finish.
Air Frying for Ultimate Crispy & Juicy Results
For the best results preheat your air fryer avoid overcrowding cook at the right temperature and flip halfway through. These steps ensure butterflied drumsticks cook evenly stay juicy and develop a crisp exterior.
Butterflied drumsticks naturally cook faster and more evenly but technique still plays a key role in getting consistent results.
Preheat Your Air Fryer
A properly preheated air fryer helps the skin start crisping immediately.
- Reduces sticking
- Promotes even browning
- Locks in moisture early
Preheat for at least 5 minutes before adding the drumsticks.
A hot start makes a noticeable difference in how quickly the skin begins to crisp.
Don’t Overcrowd the Basket
Spacing is essential for airflow.
- Prevents steaming
- Improves crispiness
- Ensures even cooking
Always place drumsticks in a single layer with space between each piece. If needed cook in batches for better results.


The Cooking Process: Time, Temperature & Flipping
Step 1: Initial Cook
Place the butterflied drumsticks in a single layer inside the preheated basket.
- Temperature: 375°F (190°C)
- Time: 10-12 minutes
This allows the chicken to cook through evenly without over-browning too quickly.
Step 2: Flip & Continue Cooking
Flip the drumsticks halfway through cooking.
- Cook an additional 8-10 minutes
- Ensures even browning on both sides
Because butterflied drumsticks have more exposed surface flipping helps maintain a balanced crisp texture.
Step 3: Check for Doneness
Use an instant-read thermometer to confirm doneness.
- Insert into the thickest part (avoid the bone)
- Target internal temperature: 165°F (74°C)
This is the most reliable way to ensure the chicken is fully cooked without overcooking.
Step 4: Rest Your Chicken
Let the drumsticks rest for 5-10 minutes after cooking.
- Helps juices redistribute
- Keeps the meat tender
- Prevents dryness
I’ve noticed that skipping this step can make the chicken lose moisture quickly after cooking.
The Science of Crispy: Achieving That Perfect Crunch
Crispy chicken in the air fryer comes from three key factors: removing moisture proper browning (Maillard reaction) and fat rendering. When these work together, you get a golden crisp exterior instead of soft or rubbery skin.
Crispiness isn’t random it’s the result of a few simple processes working together. Once you understand them, it becomes much easier to get consistent results.
The Crispy Skin Science Breakdown
1. Moisture Removal
Air fryers use fast-moving hot air to pull moisture away from the surface of the chicken. Butterflying helps by exposing more surface area.
Why it matters:
- Moisture blocks browning
- Dry skin crisps more easily
- Prepares the surface for proper browning
Making sure the chicken is dry before cooking is one of the most important steps for achieving crisp skin.
2. The Maillard Reaction
This is the process responsible for browning and flavor development.
When heat is applied to proteins and natural sugars in the chicken it creates:
- Golden color
- Rich aroma
- Slightly crisp texture
Best conditions for this:
- High, steady heat
- Dry surface
- Good airflow
- Even exposure (helped by butterflying)
This is what gives air-fried chicken that “fried” look and taste without deep frying.
3. Fat Rendering
Chicken skin contains natural fat that melts during cooking.
As this fat renders:
- The skin becomes thinner
- Texture becomes crisp instead of chewy
- Surface browns more evenly
Air fryers are effective here because hot air circulates around the entire piece helping fat render evenly especially when the drumstick is butterflied.
Why This Matters
Understanding these basics makes it easier to control your results.
When you combine:
- Proper drying
- Even shape (butterflying)
- Correct temperature
You create the conditions needed for crisp well-cooked drumsticks every time.
I’ve found that once these three factors are in place achieving consistent crispiness becomes much more predictable.
Troubleshooting Your Way to Perfection: Common Problems & Solutions
Most air fryer drumstick issues come down to moisture, airflow or temperature. Fixing these three factors helps solve problems like soggy skin uneven cooking or dryness and leads to more consistent results.
Even well-prepared drumsticks can go wrong if small details are missed. This quick guide helps you identify problems and fix them easily.
From Frustration to Fix: Diagnosing & Solving Common Issues
| Problem | Cause | Solution |
|---|---|---|
| Dry or rubbery chicken | Overcooking or uneven thickness | Use a thermometer (165°F / 74°C). Butterfly evenly and let the chicken rest 5-10 minutes |
| Soggy or soft skin | Moisture on surface or overcrowding | Pat dry thoroughly, cook in a single layer and use proper heat |
| Uneven cooking | Poor airflow or uneven shape | Flatten drumsticks properly, space them out and flip halfway |
| Seasoning doesn’t stick | Wet surface or no oil | Dry the surface add a light oil coating and press seasoning gently |
| Chicken sticks to basket | Lack of oil or sticky coating | Lightly oil the basket or use perforated liners |
| Smoke during cooking | Excess fat or dirty air fryer | Trim excess fat and clean the basket regularly |
| Not browned enough | No preheating or low temperature | Preheat for 5 minutes and cook at the right temperature add 1-2 extra minutes if needed |
Why This Matters
Small adjustments can completely change your results. Most problems are easy to fix once you know the cause.
I’ve found that focusing on airflow, dryness and temperature control solves the majority of issues without needing complicated changes.
Elevate Your Meal: Flavor Variations & Serving Ideas
Butterflied drumsticks absorb seasoning better and cook more evenly making them perfect for a variety of flavor styles. By changing spices or marinades you can easily turn a simple batch into completely different meals.
Their flatter shape gives you more surface area which helps flavors stick and develop more evenly during cooking.
Creative Seasoning Blends & Marinades
Spicy Kick
A bold option if you enjoy heat.
- Smoked paprika
- Cayenne pepper
- Cumin
- Garlic powder
This blend adds depth and a slightly smoky heat that pairs well with crispy skin.
Herbaceous Delight
Light, fresh and aromatic.
- Dried rosemary
- Thyme
- Oregano
- Onion powder
- Lemon zest
This combination works well when you want a more balanced less spicy flavor.
Asian-Inspired
Savory with a hint of sweetness.
- Ginger powder
- Garlic powder
- Five-spice powder
- Small amount of brown sugar
Optional: Brush with a light soy-based glaze in the final minutes for added flavor.
Mediterranean Twist
Simple and well-balanced.
- Dried basil
- Oregano
- Garlic powder
- Pinch of sumac
Pairs nicely with salads, rice or lighter side dishes.
Tip: Experiment with Marinades
Marinating can add another layer of flavor.
- Let the chicken sit for at least 30 minutes (or longer if possible)
- Helps soften the meat slightly
- Improves overall flavor
Before cooking, lightly pat the surface dry. This helps the skin crisp properly instead of steaming.
I’ve had the best results when I keep the marinade balanced and avoid leaving too much moisture on the surface before air frying.
Pairing Perfection: Delicious Side Dishes
The best side dishes balance the richness of crispy drumsticks with freshness or texture. Pairing with vegetables, grains or light salads creates a more complete and satisfying meal.
Simple sides can turn your drumsticks into a well-rounded dinner without adding much extra effort.
Crispy Roasted Vegetables
Air-fried vegetables like broccoli, asparagus or Brussels sprouts work perfectly.
- Add texture to the plate
- Complement the crispiness of the chicken
- Quick to prepare in the same appliance
Creamy Mashed Potatoes
A classic comfort option.
- Soft, rich texture
- Pairs well with savory flavors
- Great for absorbing juices
Fresh Green Salad
Light and refreshing.
- Balances richness
- Adds freshness and crunch
- Keeps the meal from feeling heavy
Rice or Quinoa
A simple and versatile base.
- Works with different seasoning styles
- Adds balance to the meal
- Especially good with bold or spiced flavors
Tip: Add a Finishing Touch
For extra flavor brush the drumsticks with a light coating of sauce or juices during the final minutes of cooking.
- BBQ
- Teriyaki
- Lemon-garlic
- Herb butter
This small step adds shine and enhances flavor without overpowering the crisp texture.
Cook with Confidence: Food Safety & Storage Tips
Safe cooking means reaching the right temperature, handling raw chicken properly and storing leftovers correctly. These steps ensure your meal is both safe and high quality.
Ensuring Doneness: Internal Temperature
Chicken must reach an internal temperature of 165°F (74°C).
- Check the thickest part
- Avoid touching the bone
- Use an instant-read thermometer
This is the most reliable way to ensure safety without overcooking.
Prevent Cross-Contamination
Good kitchen habits make a big difference.
- Wash hands after handling raw chicken
- Use separate cutting boards and utensils
- Clean surfaces with hot, soapy water
Keeping things clean helps avoid common food safety issues.
Storing Leftovers
Leftover drumsticks can be stored and reheated easily.
Refrigeration:
- Store in an airtight container
- Refrigerate within 2 hours
Shelf life:
- Safe for 3-4 days
Reheating for Best Results
To bring back crispiness:
- Reheat in the air fryer at 350°F (175°C)
- Cook for 5-7 minutes
This method keeps the texture much better compared to microwaving.
Your Questions Answered: Air Fryer Butterflied Drumstick FAQs
These quick answers cover the most common questions about butterflying and cooking drumsticks in the air fryer. They’ll help you avoid mistakes and get consistent crispy results every time.
Q: Can I butterfly frozen drumsticks?
No. Always thaw chicken completely before butterflying.
Frozen meat is too hard to cut safely and can lead to uneven cuts or slipping. Fully thawed chicken gives you better control and cleaner results.
Q: Do I really need to pat the chicken dry?
Yes it’s essential.
Moisture on the surface prevents proper browning and crisping. Drying the chicken helps the skin turn golden and crisp instead of soft.
Q: What if my air fryer smokes during cooking?
This usually happens when excess fat drips and burns.
To reduce smoke:
- Trim excess fat
- Place a slice of bread under the basket to absorb drips
- Clean the air fryer regularly
These small steps help keep cooking smooth and consistent.
Q: Can I use boneless chicken thighs instead?
Yes but results will be different.
- Thighs cook faster
- No need to butterfly
- Texture will be slightly different from drumsticks
Adjust cooking time accordingly to avoid overcooking.
Q: How do I know if my chicken is truly crispy?
Check using simple cues:
- Look: Deep golden-brown color
- Sound: Light crackling when touched
- Feel: Firm, crisp surface (not soft or rubbery)
These signs help confirm both texture and doneness without guesswork.
Conclusion: Your Crispy, Juicy Results Start Here
Butterflying transforms air fryer chicken drumsticks from average to consistently impressive. By opening up the meat you allow better airflow faster cooking and more even crisping solving the most common issues home cooks face.
With the techniques you’ve learned proper prep, seasoning, cooking control and simple troubleshooting you can now achieve juicy interiors and crisp skin without guesswork.
The real advantage is consistency. Once you understand how butterflying affects texture and heat distribution every batch becomes easier to manage and improve.
Now it’s your turn. Try it, adjust based on your air fryer and build your own routine. With a little practice perfectly cooked drumsticks won’t feel like effort they’ll feel automatic.
