The Best Fluffy Pancakes recipe you will fall in love with. Full of tips and tricks to help you make the best pancakes.
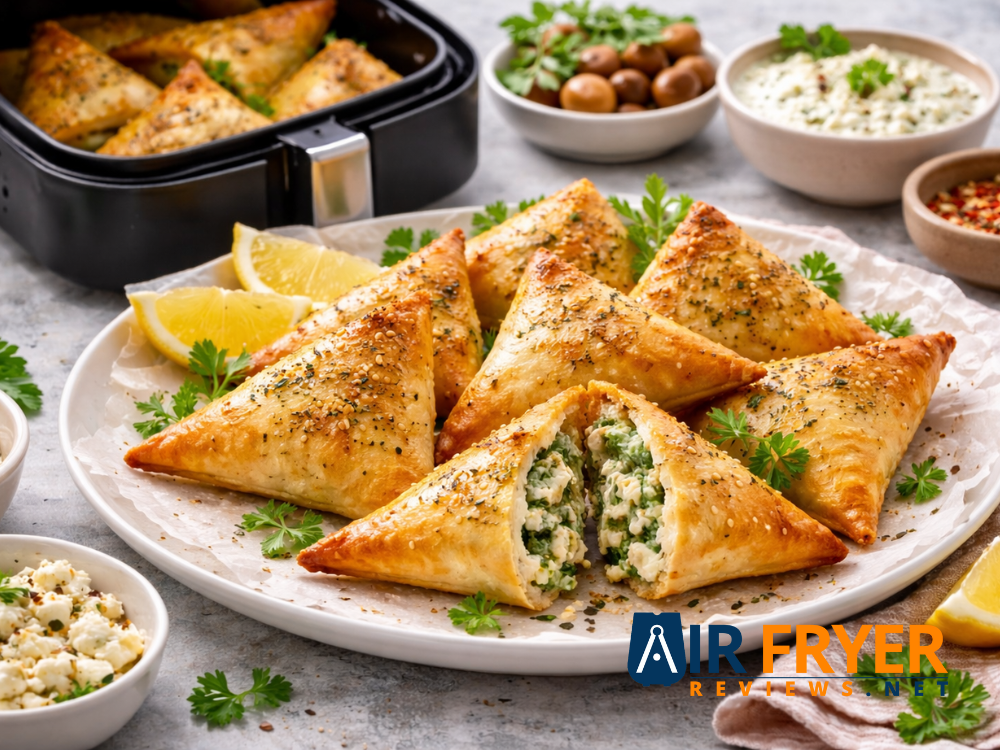
Golden, flaky pastry crisp on the outside warm and savory on the inside. That’s the magic of spinach and feta triangles a true classic of Mediterranean comfort food. With every bite, you experience the perfect harmony of buttery layers, herby spinach and creamy feta simple ingredients transformed into something unforgettable. Whether you’re serving them at a casual get-together or a special occasion these triangles instantly bring warmth, flavor and authenticity to the table much like air-fried chicken nuggets.
This guide is more than just a recipe; it’s a practical, step-by-step roadmap to making spinach and feta triangles successfully every time. Whether you choose delicate phyllo pastry or quick and convenient puff pastry, you’ll learn how to prepare a flavorful filling, achieve crisp layers and avoid common problems like soggy pastry or bland texture. Everything is explained clearly so you can cook with confidence even if it’s your first attempt.
Built on years of family tradition and Mediterranean culinary experience this guide also includes expert tips from renowned chefs Jonathan Miller and Emily Rodriguez. Their proven techniques help you master folding seasoning and baking for consistently great results. Their expertise ensures this recipe stays true to tradition while remaining easy and approachable for home cooks.
The Heart of the Dish: Crafting the Perfect Spinach & Feta Filling
Fresh vs. Frozen Spinach:
When it comes to spinach both fresh and frozen options work well but they each have specific handling requirements:
- Fresh Spinach: Fresh spinach has a delicate flavor but it requires blanching and thorough drying before adding it to your filling. Blanching helps retain the vibrant color and fresh taste while drying prevents moisture from soaking into the pastry keeping it crisp during baking.
- Frozen Spinach: Frozen spinach is a time-saver but it’s important to thaw and squeeze out every drop of water just like handling frozen chicken wings. This step is crucial to avoid soggy pastry and to ensure that the filling has the right texture.
After cooking use a cheesecloth or sturdy paper towels to press out excess moisture from the spinach. This is a key step in making sure your pastry stays crispy and your filling doesn’t become watery.
Quality Feta Cheese:
The feta cheese plays a major role in the flavor profile of your spinach and feta triangles. Choosing the right feta can make all the difference.
- Product Recommendation: For an authentic tangy flavor go for sheep’s milk feta which pairs beautifully with spinach. However cow’s milk feta is also an option for a milder taste. If you’re aiming for an authentic Mediterranean experience Greek-style feta or Bulgarian feta are great choices.
- Crumbing Techniques: To ensure an even distribution of cheese in the filling crumble the feta with your fingers or a fork. This ensures each bite has the perfect balance of spinach and feta.
Aromatic Herbs & Spices:
The right combination of herbs and spices will elevate your filling and add complexity to the flavor. Traditional herbs like dill and parsley are essential but you can also experiment with other enhancements.
- Product Recommendation: Fresh dill parsley and a hint of mint bring vibrant freshness and depth to the filling.
Don’t skip fresh herbs! Dill and parsley are essential for an authentic Mediterranean flavor. You can also add lemon zest to bring a refreshing citrusy lift to the filling.
Flavor Enhancers:
- Onion/Scallions: Finely diced onions or scallions sautéed in olive oil create an aromatic base that infuses the filling with richness a great start for a light beef burger.
- Garlic: Minced garlic adds depth and savory complexity to the flavor profile.
- Lemon Zest: A touch of lemon zest brightens the filling offering a fresh burst of flavor.
- Optional: A pinch of nutmeg or black pepper can add subtle warmth but they’re optional depending on your taste.
Preparing the Filling: Steps to Success
Step 1: Sauté Aromatics
Start by heating olive oil in a pan. Add diced onions (or scallions) and minced garlic and sauté until softened. This will create the flavor base for your filling.
Step 2: Combine Spinach & Herbs
Once the onions and garlic are softened add your thoroughly dried spinach and fresh herbs to the pan. Stir everything together letting the spinach mix evenly with the aromatics.
Step 3: Mix with Feta
Crumble the feta cheese and fold it into the spinach mixture. This ensures that the cheese is evenly distributed giving every bite the right balance of savory flavor much like air fryer sausage patties.
Step 4: Seasoning & Taste Test
Season the filling with salt, pepper and lemon zest. Taste-test the mixture and adjust the seasoning as needed to ensure the filling is perfectly balanced.
Don’t overfill the triangles! One of the most common mistakes is adding too much filling. Use just enough to allow for easy folding and proper sealing leaving space around the edges. Overfilling can cause the triangles to tear or leak during baking.
Choosing Your Pastry: Phyllo vs. Puff – A Comprehensive Guide
When preparing spinach and feta triangles the choice of pastry can greatly impact the texture and overall experience of the dish. Whether you’re aiming for the delicate crispiness of traditional phyllo dough or the buttery flaky texture of puff pastry both options bring unique advantages. Here’s a breakdown of their characteristics and handling tips to help you make an informed choice.
Phyllo Dough (Filo):
- Characteristics: Phyllo dough consists of ultra-thin delicate sheets that create numerous layers when brushed with butter or oil. This makes it the traditional choice for making spanakopita and gives the dish a light crisp texture that shatters beautifully with each bite.
- Handling: Phyllo dough is more delicate than puff pastry requiring careful thawing and handling to avoid tearing. It’s important to keep the dough moist while working with it as it dries out quickly and can become brittle.
- Product Recommendation: For convenience and consistency I recommend using frozen phyllo dough. It’s readily available at most grocery stores, saving you time compared to making it from scratch.
Puff Pastry:
- Characteristics: Puff pastry is buttery and flaky rising significantly during baking perfect for things like air-fried crescent rolls. The layers are thicker than those of phyllo dough providing a more substantial texture perfect for a frozen pot pie while still maintaining a crisp exterior. Each bite of puff pastry offers a rich indulgent experience.
- Handling: Puff pastry is easier to handle compared to phyllo. It’s less prone to tearing and doesn’t require the same delicate handling. Simply thaw roll it out and it’s ready to fill and bake.
- Product Recommendation: Like phyllo dough frozen puff pastry sheets are a convenient option. They hold up well during assembly and baking and are great for a quicker less intricate preparation.
Phyllo vs. Puff Pastry Comparison
| Attribute | Phyllo Dough | Puff Pastry |
| Texture | Crisp, numerous delicate, shatter-thin layers | Buttery, airy, significant rise, large flakes |
| Ease of Handling | Delicate, prone to tearing, requires moisture | Easier to handle more forgiving, single sheet |
| Preparation Time | More time-consuming due to layering | Quicker assembly, fewer layers to manage |
| Flavor Profile | Neutral, relies on butter/oil for richness | Rich, buttery flavor inherent in the dough |
| Traditional Use | Spanakopita, baklava, savory pies | Vol-au-vents, croissants, turnovers |
| Best For | Authentic, light, super-crispy results | Convenient, richer flavor, less fuss |
Key Considerations for Choosing the Right Pastry:
- Desired Flakiness: If you’re craving that ultra-crisp delicate texture phyllo dough is the way to go. It provides the lightest crispiest bite. On the other hand if you’re looking for a richer more indulgent experience puff pastry will give you a buttery flaky finish with a more substantial texture.
- Ease of Use: Puff pastry is much easier for home cooks especially those new to working with pastry. It’s more forgiving requires fewer steps and is ideal for quick meals or busy weeknights like super fast glazed salmon. Phyllo dough however requires patience and careful handling but rewards you with that signature crispiness and traditional flavor.
- Time Constraints: If you’re pressed for time puff pastry is the quicker option. You don’t need to layer it like phyllo dough and assembly is much faster. For a more traditional layered texture phyllo dough takes longer but offers authenticity and a delicate crispy finish.
Interactive Pastry Choice Flowchart
To make the decision easier we’ve created an interactive Pastry Choice flowchart. This guide will help you decide whether phyllo dough or puff pastry is the best fit based on your needs whether you’re prioritizing flakiness ease of use or time constraints. The flowchart will lead you to specific instructions tailored to the pastry you choose ensuring you achieve the perfect spinach and feta triangles every time.
The Ultimate Spinach & Feta Triangle Recipe Card
Course: Feta TrianglesServings
Approximately 12 Triangles
servingsPrep time
30
minutesCooking time
25
minutesCalorieskcal
This recipe has been meticulously tested for both accuracy and deliciousness ensuring that you’ll achieve perfect results every time.
Ingredients & Notes
Phyllo Dough (frozen) – 1 (1 lb) Package – Thaw in the fridge overnight then bring to room temperature before using.
Fresh Spinach (or frozen) – 1.5 lbs (or 20 oz) – Wash, stem and thoroughly dry fresh spinach. If using frozen thaw and squeeze out as much moisture as possible to avoid a soggy filling.
Feta Cheese – 8 oz – Crumbled use good-quality feta for the best flavor.
Yellow Onion – 1/2 small – Finely diced for sautéing to form the base of the flavor.
Garlic – 2 cloves – Minced for aromatic depth in the filling.
Fresh Dill – 1/4 cup – Finely chopped a traditional herb for spinach and feta fillings.
Fresh Parsley – 1/4 cup – Finely chopped adds freshness and balance.
Fresh Mint (optional) – 1 tbsp – Finely chopped optional but adds a nice touch of brightness.
Lemon Zest – 1 tsp – From 1/2 lemon brightens the filling with a citrusy zing.
Olive Oil – 2 tbsp – For sautéing the aromatics (onions and garlic).
Melted Unsalted Butter – 1/2 cup – For brushing between layers of phyllo or use olive oil for a lighter option.
Salt – To taste – Adjust after tasting the feta as it can be quite salty.
Black Pepper – 1/4 tsp – Freshly ground for seasoning.
Preparation Instructions
- Prepare the Spinach:
Fresh Spinach: Wash and remove any stems. Blanch the spinach in boiling water for 1-2 minutes then immediately transfer it to ice water to stop the cooking process. Once cooled thoroughly dry the spinach by squeezing out excess water using a cheesecloth or paper towels.
Frozen Spinach: Thaw the spinach then press out as much water as possible using cheesecloth or paper towels. It’s crucial to remove all moisture to prevent a soggy filling. - Sauté the Aromatics: Heat 2 tablespoons of olive oil in a pan over medium heat. Add the finely diced onion and cook until softened about 3-4 minutes. Add the minced garlic and cook for another 1-2 minutes until fragrant.
- Combine the Filling: In a large mixing bowl add the prepared spinach, sautéed onions and garlic. Stir in the fresh dill, parsley and mint (if using). Crumble the feta cheese into the mixture ensuring it is evenly distributed. Add lemon zest, salt and black pepper then mix well. Taste and adjust seasoning if needed.
- Assemble the Triangles:
Preheat your oven to 375°F (190°C).
Lay a sheet of phyllo dough on a clean surface. Brush lightly with melted butter (or olive oil). Place another sheet of phyllo on top and brush again with butter.
Cut the phyllo sheets into strips (about 3-4 inches wide). At one end of each strip place a spoonful of the spinach and feta filling.
Fold the dough over the filling forming a triangle shape then continue folding the triangle down the length of the strip until you reach the end. Seal the edges by brushing with a little more butter or olive oil. - Bake the Triangles:
Arrange the triangles on a baking sheet lined with parchment paper. Brush the tops with more melted butter.
Bake for 25-30 minutes or until the phyllo is golden brown and crisp. Keep an eye on them to avoid burning, as phyllo can brown quickly. - Serve: Allow the spinach and feta triangles to cool for a few minutes before serving. They are delicious on their own or served with a tangy dipping sauce such as tzatziki.
Notes
- This recipe has been tested and refined through many family gatherings ensuring it’s a reliable choice for both experienced cooks and beginners. The inclusion of Jonathan Miller and Emily Rodriguez‘s Mediterranean culinary expertise ensures authenticity and deliciousness in every bite.
Step-by-Step Triangle Assembly & Baking
Phyllo Dough Preparation:
- Always thaw phyllo dough in the refrigerator overnight to ensure it remains pliable and easy to handle. Before using it allow the dough to come to room temperature on the counter for 1-2 hours. This will help prevent tearing and ensure smooth even layers.
- While working with phyllo dough cover unused sheets with a damp cloth or plastic wrap to keep them from drying out and cracking. This is essential to maintaining the dough’s integrity while you work.
- Product Recommendation: For the best results have good-quality olive oil or melted butter on hand for brushing the layers of phyllo. This adds flavor and helps create a crispy golden finish when baked.
 2")
Puff Pastry Preparation:
- Thawing Instructions: If using frozen puff pastry follow the package instructions to thaw it just like preparing frozen chicken wings. Typically, you’ll want to allow it to thaw in the fridge for a few hours or overnight then bring it to room temperature for about 15 minutes before rolling it out.
- Briefly Rolling Out: Roll the puff pastry lightly on a floured surface to ensure it is of even thickness. This will make it easier to handle when cutting and filling.
Folding Techniques for Perfect Triangles Phyllo Triangles (Traditional Method):
Step 1: Layering Phyllo Sheets with Butter/Oil
Lay one sheet of phyllo dough on a clean surface. Brush lightly with melted butter (or olive oil). Repeat this process layering and brushing between each sheet to ensure that the pastry crisps up beautifully when baked.
Step 2: Cutting into Strips
Once your layers are ready cut the stacked phyllo into strips (about 3-4 inches wide). These strips will form the base for your triangles.
Step 3: Placing Filling at One End
Place a spoonful of the prepared spinach and feta filling at one end of each phyllo strip. Ensure the filling is evenly distributed.
Step 4: Folding into a Triangle Shape
Start folding the phyllo over the filling to form a triangle. Fold the dough diagonally keeping the filling enclosed then continue folding in a triangular pattern down the strip. Continue until you reach the end sealing the triangle with a brush of butter or olive oil.
Puff Pastry Triangles (Simplified Method):
Step 1: Cutting Puff Pastry into Squares or Rectangles
Puff pastry is generally thicker than phyllo so simply cut the dough into squares or rectangles (about 3-4 inches wide depending on the size of your desired triangles).
Step 2: Placing Filling
Place a generous spoonful of the spinach and feta filling in the center of each pastry square much like preparing air-fryer stuffed mushrooms ensuring you don’t overfill.
Step 3: Folding and Sealing Edges (Fork Crimping)
Fold the pastry into a triangle shape. Pinch the edges to seal them then use a fork to crimp the edges for extra security. This method helps prevent any filling from leaking out during baking.
Baking for Golden Perfection
Preheating & Baking Temperature:
Preheat your oven to 375°F (190°C). This temperature is ideal for achieving a perfectly crispy exterior while allowing the filling to cook through.
Arrangement on Baking Sheet:
Arrange the triangles on a baking sheet lined with parchment paper much like preparing a turkey hash browns casserole. Be sure to space them evenly allowing for air circulation and even cooking.
Brush the phyllo or puff pastry triangles generously with melted butter or olive oil. This step ensures maximum crispness and golden-brown perfection similar to air-fried chicken tenders particularly when working with phyllo dough.
For easier serving lightly score the top layers of the pastry before baking. This will make cutting the triangles easier once they’ve cooled slightly especially for larger pies or batches.
Doneness Cues:
- Color: Look for a rich golden-brown color on the phyllo or puff pastry or for savory egg-filled eggplants.
- Texture: The pastry should be crisp to the touch similar to frozen air fryer corn dogs.
- Internal Temperature: If you want to check the internal temperature it should reach around 165°F (74°C) to ensure the filling is fully cooked.
Once out of the oven allow the baked triangles to cool for a few minutes before serving. This step helps the flavors meld and gives the pastry time to set preventing the filling from spilling out when cut.
Troubleshooting & Mastering Common Challenges
This section dives into troubleshooting offering expert tips and practical solutions based on real-world experience. By addressing common issues we provide actionable advice to help ensure that your spinach and feta triangles come out perfectly every time.
Common Issues & Solutions
Soggy Bottom/Pastry:
- Problem: This issue arises when there’s excess moisture from the spinach not enough fat between layers of phyllo or if the pastry is underbaked.
- Solution:
- Squeeze spinach extra dry: Whether you use fresh or frozen spinach make sure to remove as much moisture as possible. Blanch fresh spinach and thoroughly dry it and for frozen spinach ensure it’s fully thawed and squeezed dry.
- Be generous with butter or oil between layers of phyllo dough. This will not only enhance the flavor but also create a barrier that prevents moisture from soaking into the pastry.
- Ensure your oven is hot enough (375°F/190°C) before placing your triangles inside. Bake them until the pastry is deeply golden crispy and fully cooked through producing crispy air fryer bacon bits.
Tearing Phyllo Dough:
- Problem: Tearing often happens if the phyllo dough isn’t thawed properly, is too cold or dries out too quickly.
- Solution:
- Thaw phyllo dough in the fridge overnight to ensure it stays at the right temperature. Before using let it come to room temperature for 1-2 hours to make it pliable and easy to handle.
- Cover unused phyllo sheets with a damp cloth or plastic wrap to prevent them from drying out while you work.
- Work quickly but gently phyllo dough is delicate and handling it too roughly can cause it to tear. If you treat it with care it will reward you with beautiful flaky layers.
Bland Filling:
- Problem: A bland filling can result from not using enough seasoning lack of fresh herbs or insufficient acidity.
- Solution:
- Don’t hold back on fresh dill, parsley and lemon zest. These ingredients provide that authentic Mediterranean flavor that will elevate your filling.
- Taste the filling before assembling the triangles. Adjust the seasoning to your liking and consider adding a touch of ricotta or cream cheese for a creamy texture or Parmesan for an extra savory kick.
- Balance the acidity with lemon zest or a squeeze of lemon juice for a burst of brightness that brings the flavors together.
Overfilling:
- Problem: Overfilling causes the triangles to burst during baking making them difficult to fold neatly.
- Solution:
- Use just enough filling to allow for neat folding and proper sealing. Leave a small margin around the edges to ensure the triangles stay sealed.
- If you’re working with puff pastry which expands more than phyllo be particularly careful not to overfill.
Uneven Browning:
- Problem: Uneven browning can be caused by oven hot spots or overcrowding the baking sheet.
- Solution:
- Rotate the baking sheet halfway through cooking to ensure that both sides of the triangles brown evenly.
- Avoid overcrowding the pan. Give each triangle enough space to bake properly and allow heat to circulate around them.
Prevention is Key: Proactive Measures
Mise en Place:
Before you begin have all your ingredients and tools ready. This includes thawing your phyllo dough prepping your filling and setting up your baking sheet. Having everything in place ensures a smooth workflow and minimizes mistakes.
Temperature Control:
Ensure that the phyllo dough is at room temperature before using it. Cold dough can tear easily making it difficult to work with. Also, make sure the filling is cool before placing it in the pastry hot filling can cause the dough to become soggy or melt too early.
Gentle Handling:
Handle phyllo dough gently to avoid tears and uneven layers. Work slowly and carefully slow and steady wins the race when it comes to creating delicate flaky pastries.
Prep Ahead & Storage Solutions Making Triangles in Advance
Unbaked & Refrigerated:
- How to Store: If you plan to make your spinach and feta triangles ahead of time store them unbaked in the fridge. To prevent the dough from sticking together layer the triangles between parchment paper in an airtight container. This helps maintain their shape and prevents them from becoming soggy.
- Shelf Life: Stored in this manner the spinach and feta triangles will last up to 2 days in the refrigerator. It’s best to bake them within this time frame for optimal results.
- Baking from Chilled: When you bake refrigerated triangles you may need to adjust the baking time slightly. Since they will be colder than if baked immediately add about 5 minutes to the usual baking time to achieve the crispy golden texture you want.
Unbaked & Frozen:
- For make-ahead convenience assemble Tyson frozen chicken wings and freeze them unbaked. Place them on a baking sheet in a single layer and freeze until solid. Once frozen transfer them to an airtight container or freezer bag for long-term storage.
- How to Store: Layer the triangles with parchment paper to prevent them from sticking to each other while in storage.
- Shelf Life: Unbaked triangles can be frozen for up to 3 months making this an excellent option for meal prep or for preparing in advance for gatherings.
- Baking from Frozen: Bake directly from frozen without thawing. Add 10-15 minutes to the usual baking time to ensure the pastry bakes all the way through and becomes golden and crisp.
Baked & Refrigerated:
- Storage Tips for Baked Triangles: If you have leftover baked triangles store them in an airtight container in the refrigerator. They will stay fresh for up to 3 days.
- Reheating Instructions: To reheat the baked triangles place them in a preheated oven at 375°F (190°C) for about 10 minutes to crisp them up. Alternatively, use the air fryer for about 5 minutes to restore their crispy texture.
Baked & Frozen:
- Best Way to Freeze Baked Triangles: Allow the baked triangles to cool completely before freezing. Once cooled place them on a baking sheet and freeze until solid. Once frozen transfer them to an airtight container or freezer bag. This method preserves the texture and ensures the triangles stay intact during storage.
- Reheating for Crispy Results: For the perfect crispy texture when reheating baked triangles from frozen use the oven or if considering a purchase consult an air fryer buying guide:
Reheating for Best Results
Oven Method:
The oven is the best option for reheating spinach and feta triangles as it will help preserve the crispiness of the pastry. Preheat to 375°F (190°C) and bake for about 10 minutes until the pastry is hot and crispy.
Air Fryer Method:
If you’re short on time the air fryer is a quick and effective way to reheat your triangles. Set the air fryer to 350°F (175°C) and heat for 5-7 minutes until golden brown.
Microwave (Use with Caution):
While the microwave is the fastest option it can make the pastry soggy. If you choose to use the microwave reheat the triangles for 20-30 seconds at a time checking for temperature. The microwave is best for quick warming but is not recommended for retaining crispiness.
Versatile Serving Suggestions & Pairing Perfection
As an Appetizer:
Spinach and feta triangles are perfect for any gathering. Whether served at a party or as part of a canapé spread they’re sure to be a crowd favorite loved by guests of all ages.
Part of a Meze Platter:
These savory triangles are a great addition to a meze platter. Pair them with Mediterranean classics like olives, hummus, tzatziki and dolmades to create a satisfying spread that’s perfect for sharing.
Light Lunch/Brunch:
For a light meal serve these spinach and feta triangles with a fresh salad. A tangy Greek salad featuring tomatoes, cucumbers, olives and feta works wonderfully alongside the crispy pastries.
Kid-Friendly Snack:
These air-fried chicken nuggets are a fantastic choice for kids. They’re easy to hol bite-sized and packed with flavor perfect for young appetites.
Complementary Dips & Beverages
Dips:
- Tzatziki: The creamy and cool texture of tzatziki is the perfect complement to the crispy spinach and feta triangles.
- Plain Greek Yogurt with Herbs: This simple dip adds a fresh tangy flavor that balances the richness of the filling.
- Spicy Feta Dip: If you prefer a bolder pairing try a spicy feta dip. The creamy tangy kick will enhance the spinach and feta filling.
Beverages:
- Crisp White Wine: A Sauvignon Blanc or Assyrtiko is an excellent choice as both offer refreshing acidity that balances the richness of the triangles.
- Light Beer: A pale ale or lager complements the buttery pastry without overwhelming the flavors.
- Sparkling Water with Lemon: For a non-alcoholic option sparkling water with a squeeze of fresh lemon is a refreshing and light choice that enhances the savory flavors of the triangles.
Thematic Presentation Ideas
- Garnish with Fresh Dill or Parsley: After baking garnish the triangles with fresh dill or parsley for a burst of color and added flavor. This simple touch elevates the egg-filled eggplants and ties it back to its Mediterranean roots.
- Serve on a Rustic Wooden Board: For an inviting and charming presentation arrange the spinach and feta triangles on a rustic wooden board. It gives the dish a homemade feel perfect for sharing at any gathering.
Common Queries About Spinach & Feta Triangles (FAQs)
Can I use different cheeses?
Answer: Yes! While feta is traditional feel free to experiment with other cheeses. For a creamier texture add a small amount of ricotta or cream cheese. For a more savory flavor try incorporating a touch of Parmesan or Pecorino. Mixing different cheeses can give your filling a unique twist!
Is there a gluten free option?
Answer: Yes, you can make gluten-free spinach and feta triangles by using gluten-free phyllo or puff pastry. Many stores offer gluten-free versions so check the freezer section for options.
How can I make this recipe healthier?
Answer:
- Use olive oil instead of butter for a healthier fat source that still adds flavor.
- Reduce the cheese slightly to cut down on fat content or opt for a low-fat version of feta.
- Add more fresh vegetables to the filling to boost the fiber content and make the dish more nutritious.
Expert Tip: Consider a Nutritional Deep Dive for a detailed breakdown on making this dish even healthier or consult a nutritionist for personalized advice.
What’s the difference between these and Spanakopita?
Answer: While spanakopita is traditionally a larger pie-style dish spinach and feta triangles are individual portions. Both use the same delicious spinach and feta filling but triangles are more convenient and easier to serve at parties or gatherings.
Can I make the filling vegetarian/vegan?
Answer:
- The filling is already vegetarian because it contains spinach and feta.
- To make it vegan simply replace the feta cheese with a plant-based feta alternative and ensure you use olive oil or vegan butter instead of dairy butter. You can also enhance the flavor with extra herbs or nutritional yeast.
How do I prevent the pastry from drying out?
Answer: Always cover unused phyllo sheets with a damp cloth or plastic wrap while working. Phyllo dough dries out quickly so keeping it moist is crucial to preventing tears and ensuring the layers stay pliable.
Conclusion: Your Golden, Flaky Triumph Awaits
Making spinach and feta triangles at home is not only rewarding but also surprisingly easy. With the expert tips provided you’ll be able to create flaky, golden triangles using either phyllo dough or puff pastry. Each step from preparing the filling to folding the dough ensures a delicious result.
Whether this is your first time making spinach and feta pastries or you’re refining your technique this guide empowers you to confidently create these delightful snacks. The result will be a savory turkey hash browns casserole that anyone can enjoy.
I’d love to see how your spinach and feta triangles turn out! Feel free to share your photos comment with any variations you try or explore other Mediterranean-inspired recipes on the site to keep the culinary adventure going.
The satisfaction of creating perfectly crispy golden chicken tenders is an experience worth savoring. This guide is here to provide you with tried-and-true methods backed by expert insights to help you master this dish with confidence.
